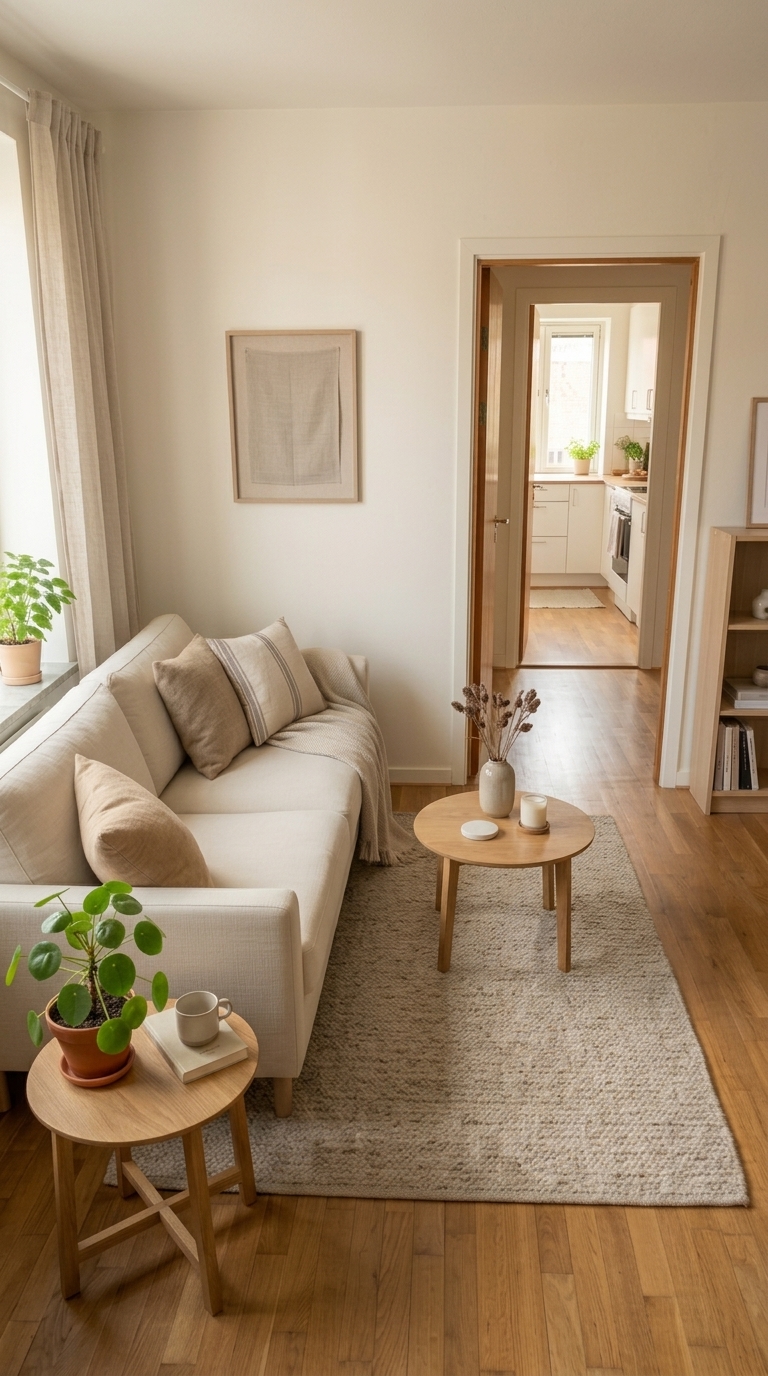
IKEA Billy Library Wall: How to Create Floor-to-Ceiling Built-Ins on a Budget
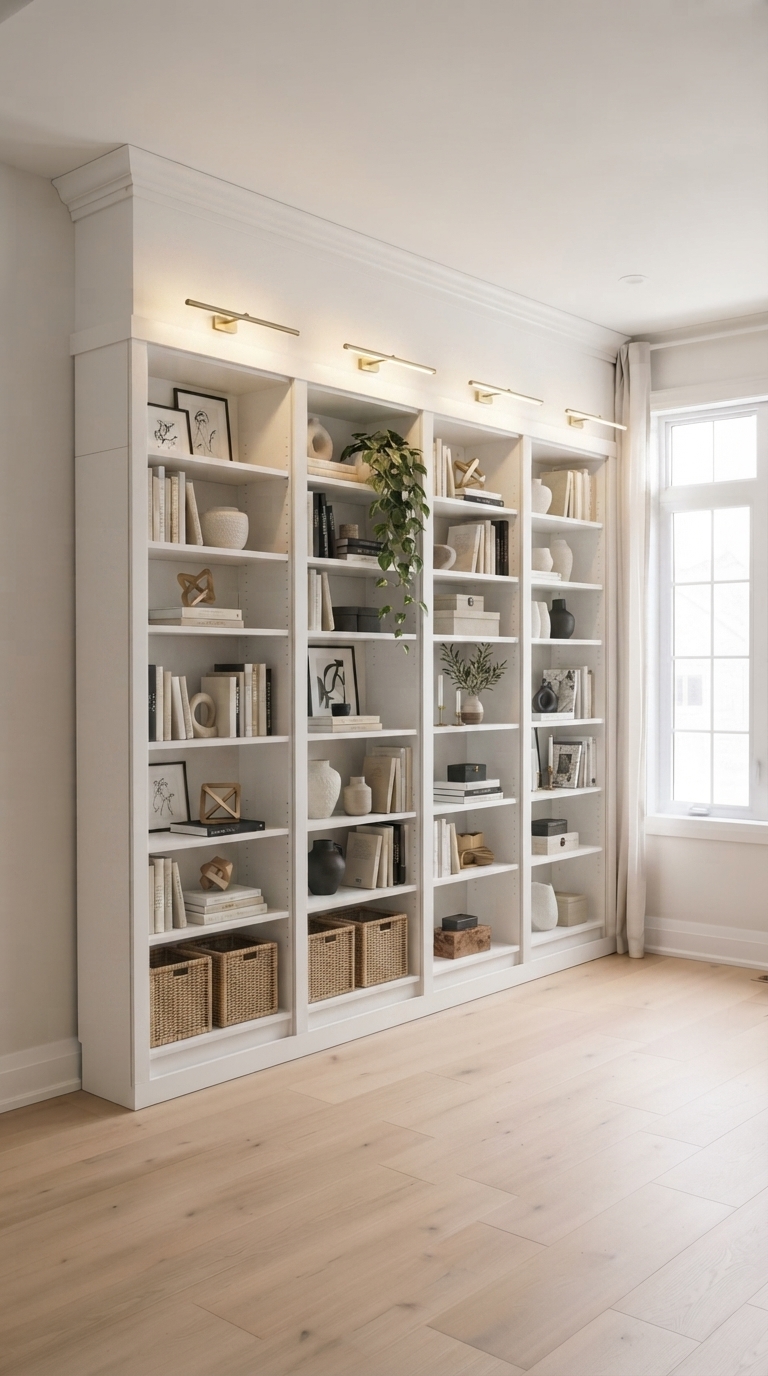
There is something instantly inviting about an IKEA Billy library wall filled with books, framed artwork, and warm lighting. A floor-to-ceiling bookshelf can completely transform a room, making it feel cozy, intentional, and custom-built.
However, creating a custom library wall can be expensive. Professional built-in bookshelves often cost several thousand dollars, putting them out of reach for many homeowners.
Fortunately, the IKEA Billy bookcase offers a more affordable alternative. With careful planning, trim, paint, and a few finishing touches, these simple shelves can become a stunning built-in feature that looks far more expensive than it is. The modular design also makes it easy to create a layout that fits your space and budget.
In this guide, you’ll learn how to plan your IKEA Billy library wall, choose the right materials, build a seamless floor-to-ceiling design, and style it like a designer. Whether you’re updating a living room, home office, or reading nook, this project can help you create a feature that feels both beautiful and functional.
Before you start measuring your wall, let’s look at why the IKEA Billy system has become a favorite for DIY built-in bookshelves.
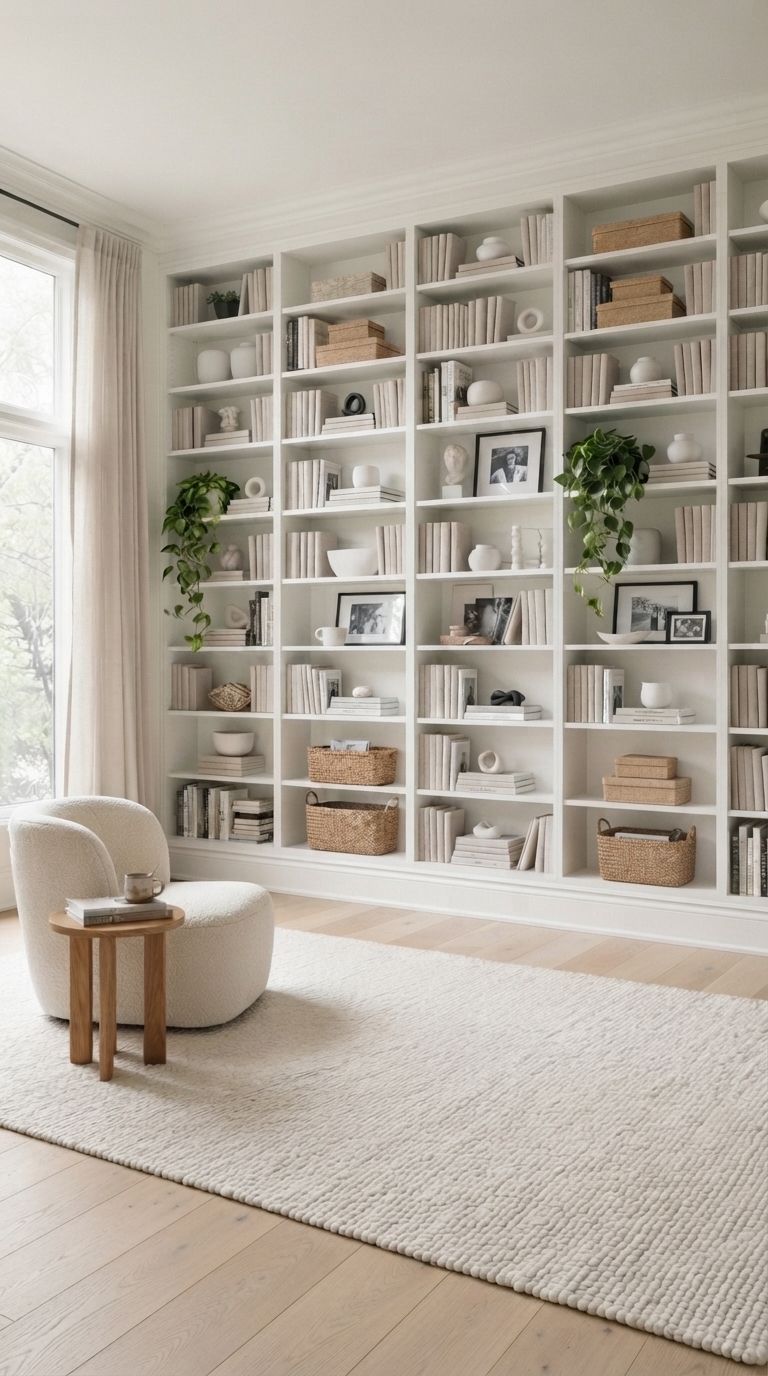
Is an IKEA Billy Library Wall Worth It?
If you love the look of custom built-ins without the high price, an IKEA Billy library wall is one of the best DIY projects you can take on. With thoughtful planning and a few finishing touches, you can transform simple bookcases into a timeless built-in feature that adds style, storage, and personality to your home.
Who This Project Is Perfect For
Homeowners decorating on a budget. Enjoy the look of custom built-ins without the premium price tag.
DIYers who enjoy weekend projects. If you’re comfortable assembling furniture, taking accurate measurements, and adding trim and paint, this project is well within reach.
Homes with awkward layouts. Thanks to its modular design, the Billy system adapts easily to corners, windows, and home offices.
Who Should Skip It
Complete DIY beginners. Installing trim and creating a seamless built-in finish requires patience, precision, and basic DIY skills.
Renters with strict lease restrictions. If you can’t anchor furniture or make permanent changes, this project may not be the best fit.
If you’re willing to invest a weekend or two, an IKEA Billy library wall offers an affordable way to create a custom-looking feature that adds lasting style and practical storage to your home.

Why IKEA Billy Is Perfect for a Library Wall
If you’ve spent any time browsing Pinterest or home design magazines, you’ve probably noticed that many beautiful library walls start with the IKEA Billy bookcase. That’s because the Billy system is affordable, versatile, and easy to customize, making a built-in look achievable without building shelves from scratch.
Whether you’re creating a cozy reading nook or transforming an entire living room wall, Billy bookcases provide a flexible foundation that suits almost any space.
Affordable Without Sacrificing Style
Custom built-ins can be expensive, but an IKEA Billy library wall offers a budget-friendly alternative. With trim, crown molding, and paint, the finished result can look surprisingly custom.
Flexible IKEA Billy Library Wall Layouts
Billy’s modular design makes it easy to create a layout that fits your room. Mix different widths and heights to maximize everything from narrow walls to spacious living rooms and home offices.
Customize Your IKEA Billy Library Wall
The simple design makes Billy easy to customize. Paint the bookcases, add glass doors, install height extension units, or line the back panels with wallpaper to create a look that suits your style.
Expand Your IKEA Billy Library Wall Over Time
You don’t have to build your entire library wall at once. Start with a few bookcases and expand over time as your storage needs or budget change.
That’s one of the biggest reasons the IKEA Billy system remains a favorite among DIYers. It offers the flexibility to create a library wall that looks custom while adapting to your home over time.
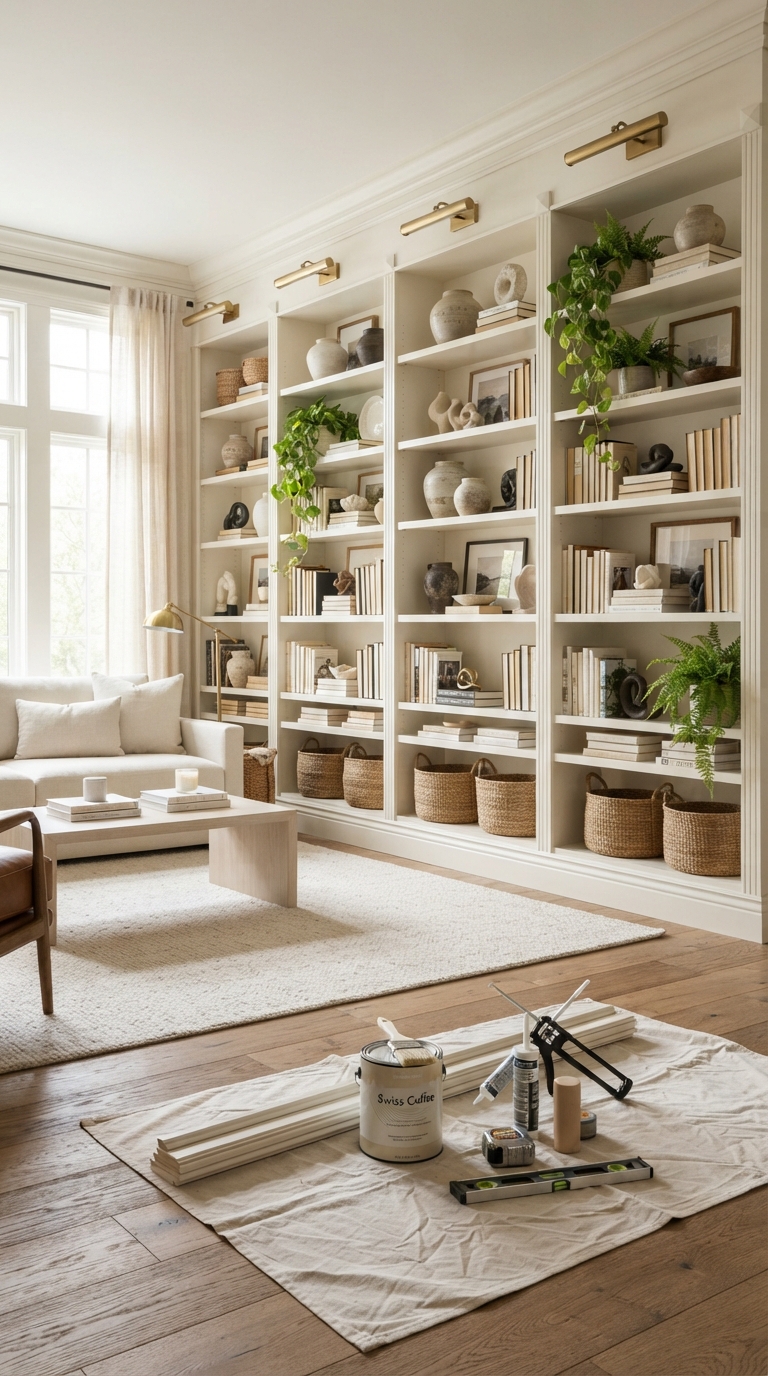
Plan Your IKEA Billy Library Wall Before You Buy
A professional-looking library wall starts with good planning. Taking time to measure your space and map out the layout before buying anything helps you avoid costly mistakes and achieve a cleaner built-in finish.
Start With Accurate Measurements
Before choosing your bookcases, measure your wall’s width, floor-to-ceiling height, and available depth. These measurements determine how many Billy units you’ll need and whether height extension units or additional trim are required.
Measure each wall in several places since walls are rarely perfectly straight. Also note the location of baseboards, windows, doors, outlets, and vents to avoid surprises during installation.
Choose the Right IKEA Billy Bookcases
One of the Billy system’s biggest strengths is its modular design. Standard 80 cm bookcases work well for the main sections, while 40 cm units help fill narrower spaces and create a balanced layout. If you’re aiming for a floor-to-ceiling look, add IKEA’s matching height extension units.
Plan Your IKEA Billy Library Wall Layout
Decide whether a full-wall or partial-wall layout works best for your space. A full-wall design maximizes storage and creates a dramatic built-in appearance, while a partial-wall layout leaves open wall space for a lighter, more flexible look.
Before placing your order, sketch a simple layout. It’s an easy way to spot potential issues before installation begins.
Should Your IKEA Billy Library Wall Reach the Ceiling?
One of the easiest ways to make an IKEA Billy library wall look custom is to eliminate the gap above the bookcases. Height extension units, trim, and crown molding create a seamless floor-to-ceiling appearance.
With your measurements and layout complete, you’re ready to gather your materials and start building with confidence.

Materials You’ll Need
Before you start building your IKEA Billy library wall, gather all your tools and supplies in one place. Being organized from the start will save time, reduce interruptions, and make the installation process much smoother. While the exact quantities will depend on your wall size and layout, the materials below form the foundation of most IKEA Billy built-in projects.
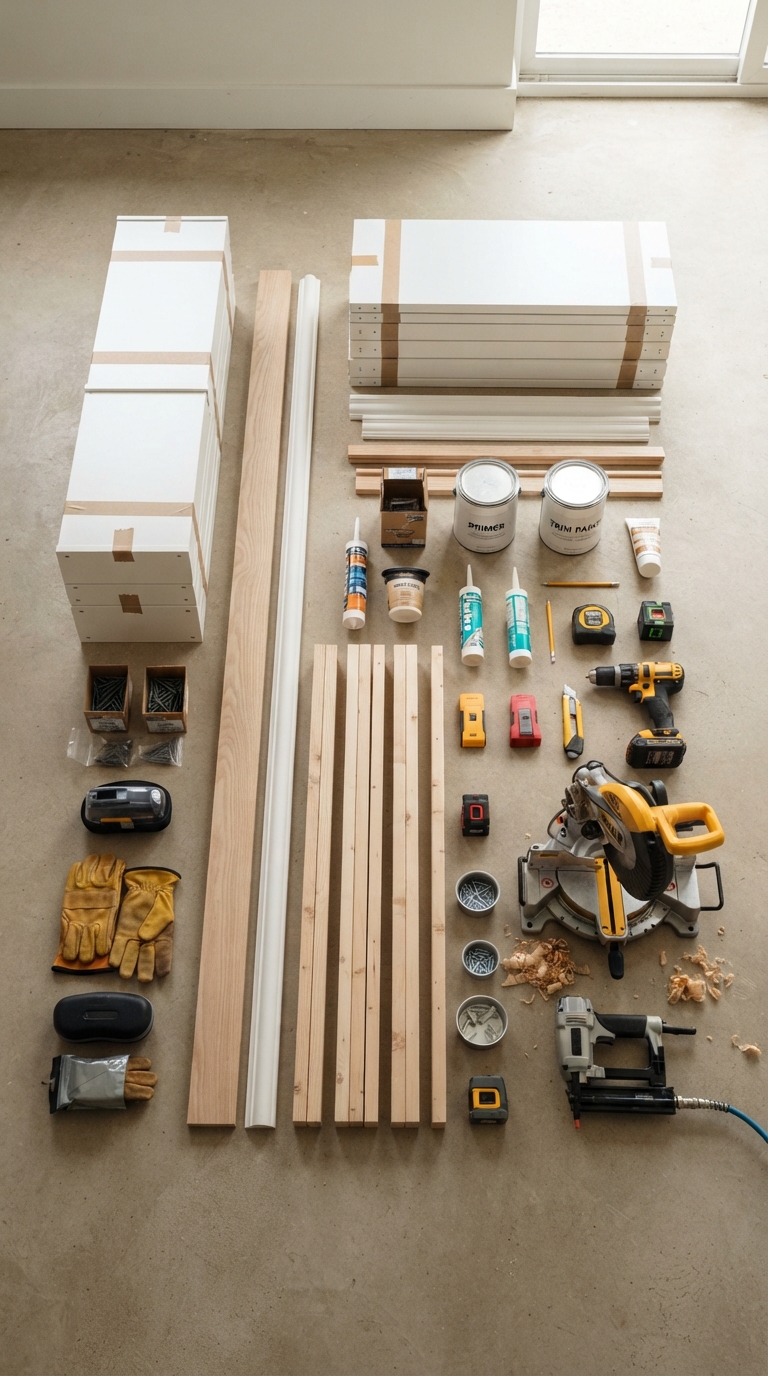
Core IKEA Billy Library Wall Materials
- IKEA Billy bookcases – The foundation of your library wall. Mix and match sizes to fit your wall dimensions.
- IKEA height extension units – Help create a floor-to-ceiling built-in look by reducing the gap above the bookcases.
- 2×3 or 2×4 lumber – Used to build a sturdy base platform that supports the bookcases and clears existing baseboards.
- MDF or pine trim boards – Cover seams, side gaps, and exposed edges for a seamless built-in appearance.
- Crown molding – Blends the top of the bookcases into the ceiling for a polished, custom finish.
Hardware and Finishing Supplies
- Heavy-duty screws or wall anchors – Secure the bookcases safely to the wall for added stability.
- Cabinet joining screws – Connect adjacent bookcases into one continuous unit.
- Construction adhesive – Helps secure trim and molding in place.
- Shellac-based primer – Allows paint to bond properly to IKEA’s laminate surface.
- Cabinet or trim paint – Provides a smooth, durable finish that stands up to everyday use.
- Paintable caulk and wood filler – Hide joints, seams, nail holes, and shelf-pin holes for a cleaner built-in look.
Essential IKEA Billy Library Wall Tools
| Tool | Why You’ll Need It |
|---|---|
| Tape Measure | Measure your wall, ceiling height, and bookcases accurately before installation. |
| Pencil | Mark measurements, trim placement, and cutting lines. |
| Stud Finder | Locate wall studs for safe and secure anchoring. |
| Level or Laser Level | Keep the base platform and bookcases perfectly level. |
| Power Drill & Driver | Assemble the bookcases and fasten them securely to the wall. |
| Miter Saw | Make clean, accurate cuts for trim and crown molding. |
| Brad Nailer or Hammer | Attach trim and molding for a seamless built-in finish. |
| Caulk Gun | Apply paintable caulk and construction adhesive neatly. |
| Safety Glasses | Protect your eyes while cutting wood and using power tools. |
Pro Tip: Lay out all your materials before opening the first flat-pack box. It’s much easier to spot missing supplies before installation begins than halfway through the project.
Now that everything is ready, it’s time to start building your IKEA Billy library wall step by step.
How to Build an IKEA Billy Library Wall
With your materials ready, it’s time to turn a row of IKEA Billy bookcases into a custom-looking library wall. Take your time with each step, especially the finishing work. Those final details are what transform ordinary flat-pack furniture into built-in cabinetry that looks professionally installed.
Step 1: Build the Base Platform
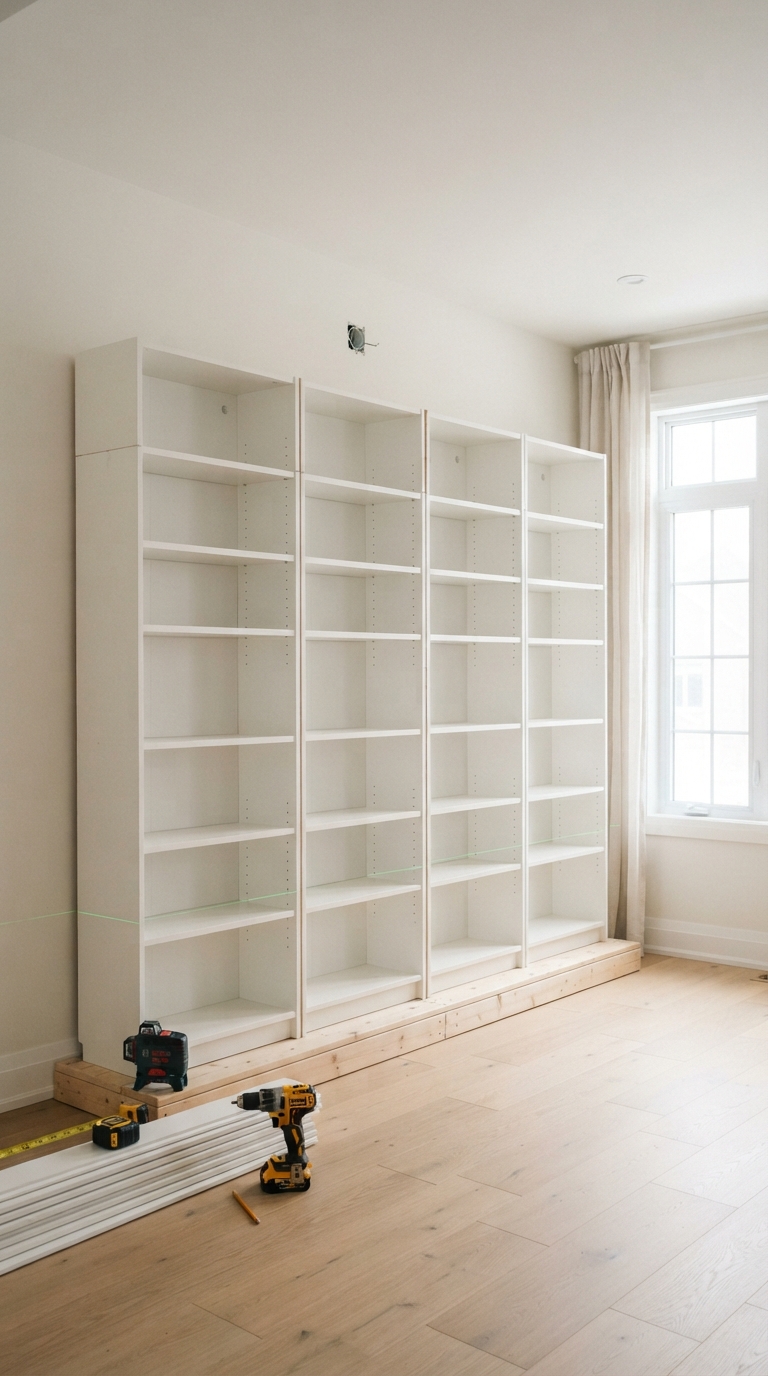
Start by building a sturdy base from 2×3 or 2×4 lumber. This platform raises the bookcases above your baseboards, keeps the installation level, and creates the foundation for a convincing built-in appearance.
Cut the lumber to match the width and depth of your planned layout, then assemble the frame with wood screws. Position it against the wall and check that it’s perfectly level. If necessary, use wood shims to correct any uneven spots before securing the platform in place.
Step 2: Assemble the Billy Bookcases
Next, assemble each IKEA Billy bookcase and any height extension units according to the manufacturer’s instructions. Before moving on, check that every unit is square and stable.
Pro Tip: If you plan to paint or wallpaper the back panels, do it before installing them. Working on a flat surface is much easier than painting inside assembled shelves.
Step 3: Secure the Bookcases to the Wall
Place the assembled bookcases on the base platform and slide them into their final position. Use a stud finder to locate the wall studs, then anchor every bookcase securely with structural screws or other suitable heavy-duty fasteners.
This step is essential because a fully loaded library wall can become extremely heavy. Proper anchoring helps prevent shifting and keeps the installation safe for years to come.
Step 4: Join the Bookcases Together
Clamp neighboring bookcases tightly together so the front edges sit perfectly flush. Then use cabinet joining screws to fasten the side panels from the inside.
This simple step removes visible gaps and creates the appearance of one continuous built-in unit instead of several separate bookcases.
Pro Tip: If you plan to paint or wallpaper the back panels, do it before installing them. Working on a flat surface is much easier than painting inside assembled shelves.
Step 5: Install Trim and Crown Molding
This is where your project starts looking less like IKEA furniture and more like custom cabinetry.
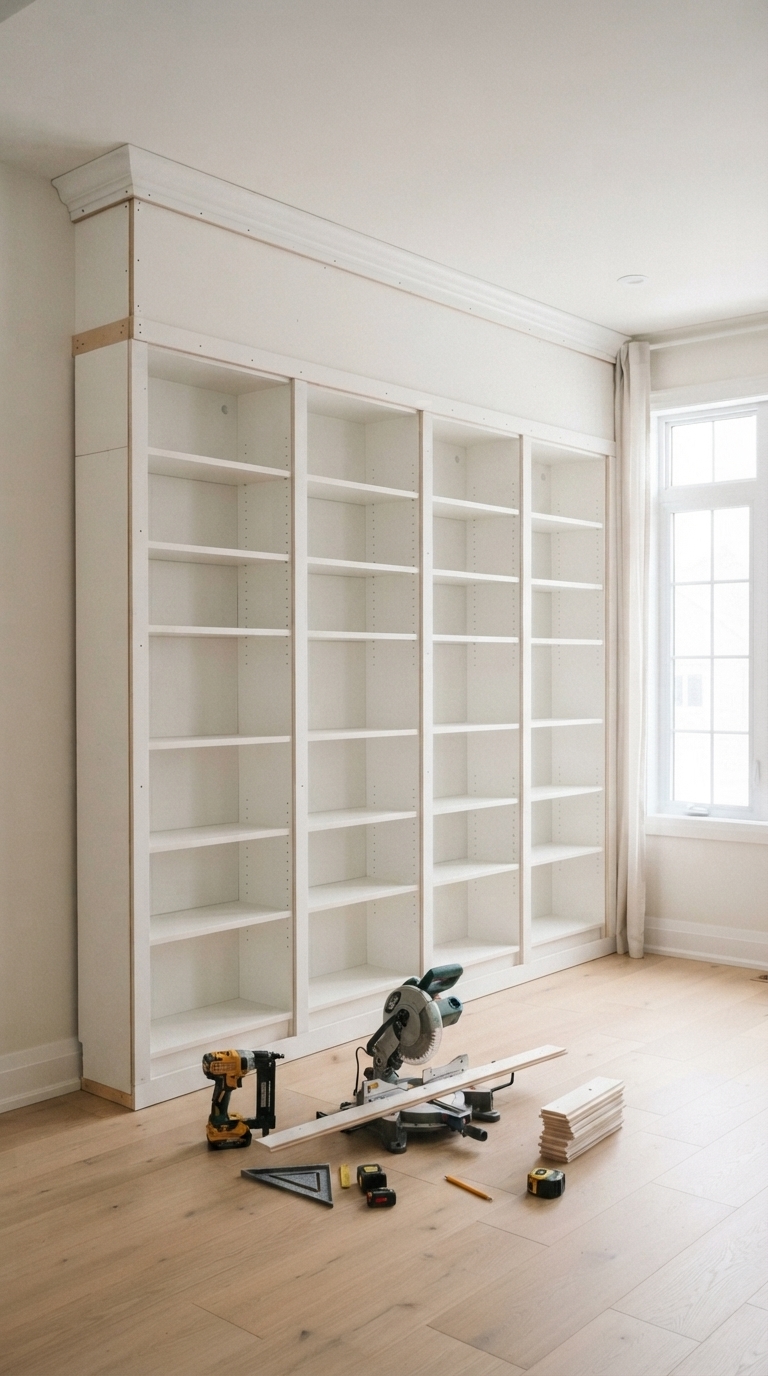
Cover the seams between the bookcases with trim boards, then install a header board above the units if needed. Finish by attaching crown molding along the top. Together, these finishing pieces blend the bookcases into the surrounding walls and ceiling for a seamless built-in look.
Step 6: Fill Gaps and Sand Smooth
Use paintable caulk to seal the joints where the bookcases meet the walls, ceiling, and trim. Fill nail holes, seams, and unused shelf-pin holes with wood filler.
Once everything has dried, lightly sand the filled areas until the surface feels smooth and ready for primer.
Step 7: Prime and Paint
Apply a shellac-based primer designed for laminate surfaces and allow it to dry completely. Then apply two thin coats of cabinet or trim paint using a microfiber roller for large surfaces and an angled brush for corners and molding.
Resist the temptation to apply thick coats. Several thin coats create a smoother, more durable finish with fewer brush marks.
Step 8: Add the Final Touches
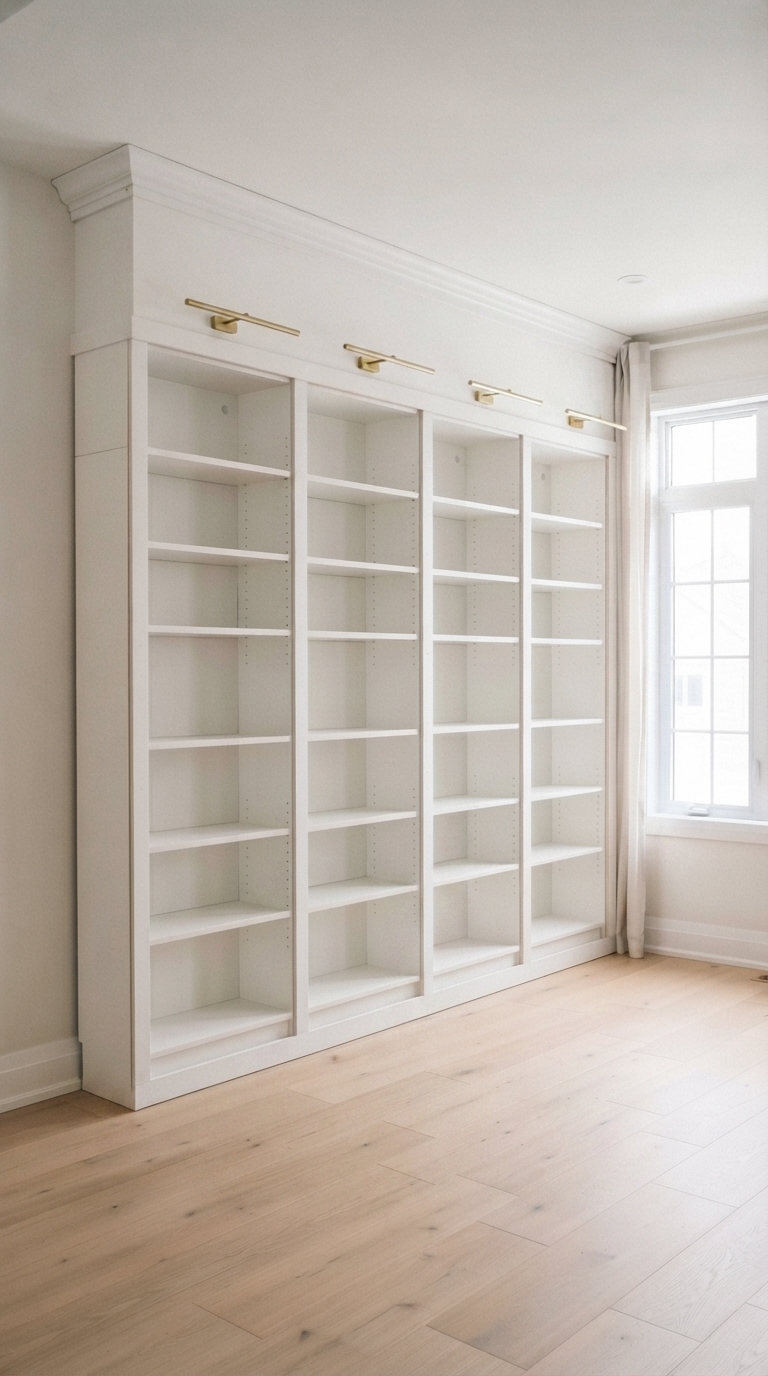
Allow the paint to cure fully before decorating the shelves. Once it’s dry, style your library wall with books, artwork, baskets, and decorative objects. For an even more custom look, install LED picture lights above the shelves to highlight your display and create a warm, inviting atmosphere.
Before filling every shelf, take a moment to learn the most common IKEA Billy library wall mistakes. Avoiding them now can save time, improve the final result, and help your built-ins look professionally finished.
Common IKEA Billy Library Wall Mistakes to Avoid
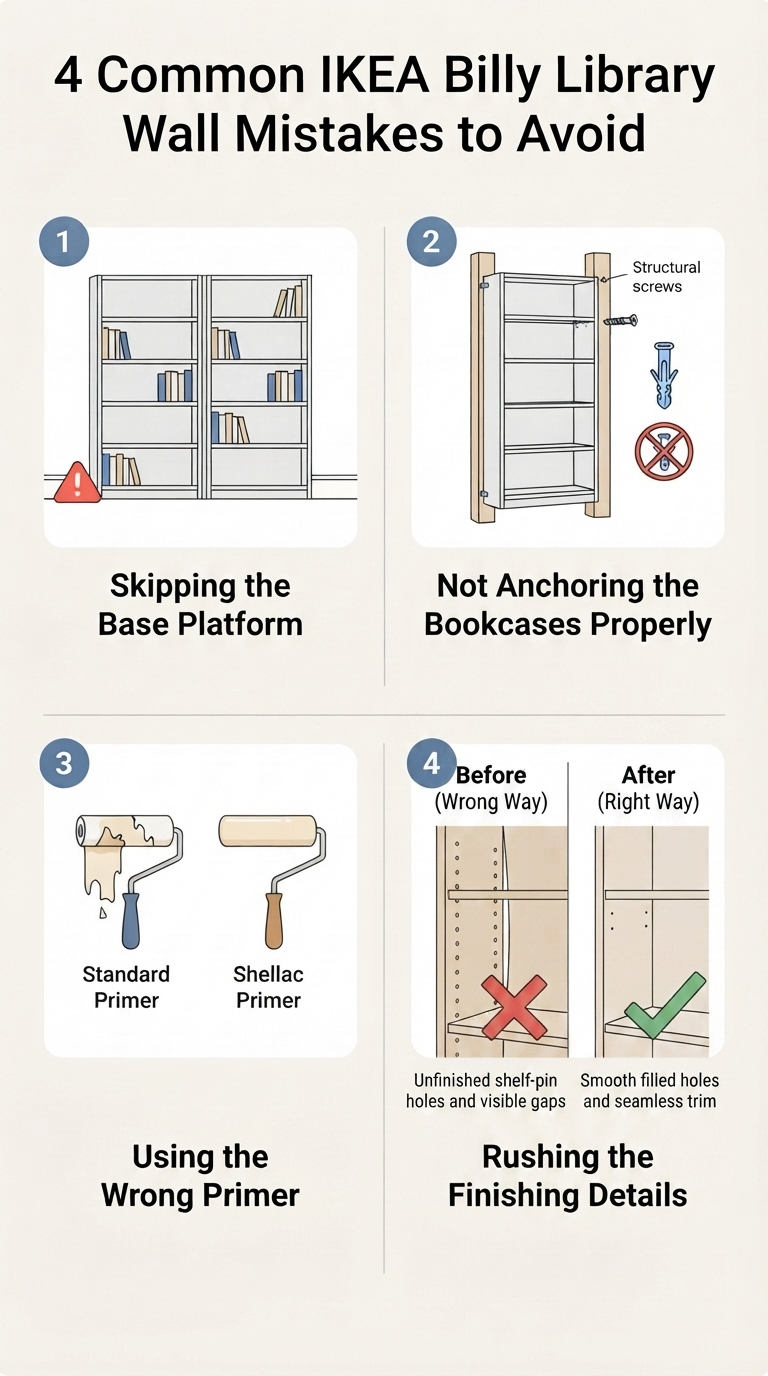
Building an IKEA Billy library wall is a beginner-friendly DIY project, but a few common mistakes can affect the final result. Avoiding them will help you achieve a safer, more polished built-in finish.
Skipping the Base Platform
Placing the bookcases directly on the floor makes it difficult to clear existing baseboards and achieve a true built-in look. A sturdy base platform keeps the units level, provides a solid foundation, and makes installing trim much easier.
Not Anchoring the Bookcases Properly
Once filled with books and décor, a library wall becomes surprisingly heavy. Secure every bookcase to wall studs using heavy-duty screws or suitable wall anchors to improve stability and prevent shifting over time.
Using the Wrong Primer
IKEA’s laminate surface doesn’t bond well with standard wall primer, which can cause paint to peel or chip. A shellac-based primer provides better adhesion and creates a smoother, longer-lasting finish.
Rushing the Finishing Details
Don’t rush the final steps. Fill shelf-pin holes, caulk seams, sand rough spots, and allow each coat of primer and paint to dry properly. These small details make the difference between an ordinary DIY project and a professional-looking built-in.
How to Style an IKEA Billy Library Wall Like a Designer
Once the paint has fully cured, it’s time to make your IKEA Billy library wall feel like part of your home. The best-styled shelves balance practical storage with carefully chosen décor. Instead of filling every shelf, create a display that feels layered, balanced, and effortless.
Style Your IKEA Billy Library Wall with Mixed Book Displays
Avoid arranging every book in long vertical rows. Mix upright books with a few horizontal stacks to create visual interest. Those stacks also double as platforms for candles, small plants, or decorative objects.
Layer Books with Décor
Books should remain the focal point, but a few well-chosen accessories add warmth and personality. Mix in framed artwork, ceramic vases, woven baskets, and greenery for texture. For a cohesive look, repeat similar colors and materials throughout the shelves.
For more inspiration, explore our IKEA Billy Bookcase Styling Ideas for Designer Shelves, where you’ll find shelf layouts, decorating tips, and styling ideas for every room.
Let the Shelves Breathe
Resist the urge to fill every shelf. Leaving some open space helps books and décor stand out while giving the entire library wall a lighter, more curated feel. If a shelf starts to look crowded, remove an item before adding another.
IKEA Billy Library Wall vs Custom Built-Ins
| Feature | IKEA Billy | Custom Built-Ins |
|---|---|---|
| Cost | Budget-friendly | Premium investment |
| Installation | DIY | Professional |
| Timeline | 1–2 weekends | Several weeks |
| Customization | Highly flexible | Unlimited |
Frequently Asked Questions
Can an IKEA Billy library wall reach the ceiling?
Yes. Pair standard IKEA Billy bookcases with matching height extension units, then finish the top with a wood header and crown molding to create a seamless floor-to-ceiling built-in appearance.
How much does an IKEA Billy library wall cost?
The total cost depends on the size of your wall, the number of bookcases, and the finishing materials you choose. Even after adding trim, paint, and hardware, an IKEA Billy library wall is typically much more affordable than professionally built custom cabinetry.
Can you paint an IKEA Billy bookcase?
Yes, but preparation is essential. Lightly sand the laminate surface, apply a shellac-based primer such as Zinsser BIN, then finish with a durable cabinet or trim paint for long-lasting results.
Do IKEA Billy bookcases need to be anchored to the wall?
Yes. Always secure each bookcase to wall studs using heavy-duty screws or suitable wall anchors. This is especially important for tall library walls that will hold books, décor, and other heavy items.
Conclusion
An IKEA Billy library wall is proof that a custom-looking home doesn’t have to come with a custom price tag. With the right layout, a few finishing touches, and a little patience, you can transform ordinary bookcases into a built-in feature that looks polished, practical, and uniquely yours.
Whether you’re creating a cozy reading nook, upgrading a living room, or adding storage to a home office, this project is a rewarding way to make better use of your space while adding lasting style.
If you’re ready for your next IKEA project, explore these guides for even more inspiration:
- IKEA Billy Bookcase Styling Ideas for Designer Shelves
- How to Make an IKEA Billy Bookcase Look Like White Oak
- Budget Home Decor Ideas That Look Expensive
- Small Living Room Layout Ideas with TV and Bookcase