IKEA Billy Bookcase Hacks: Create Fake Built-Ins
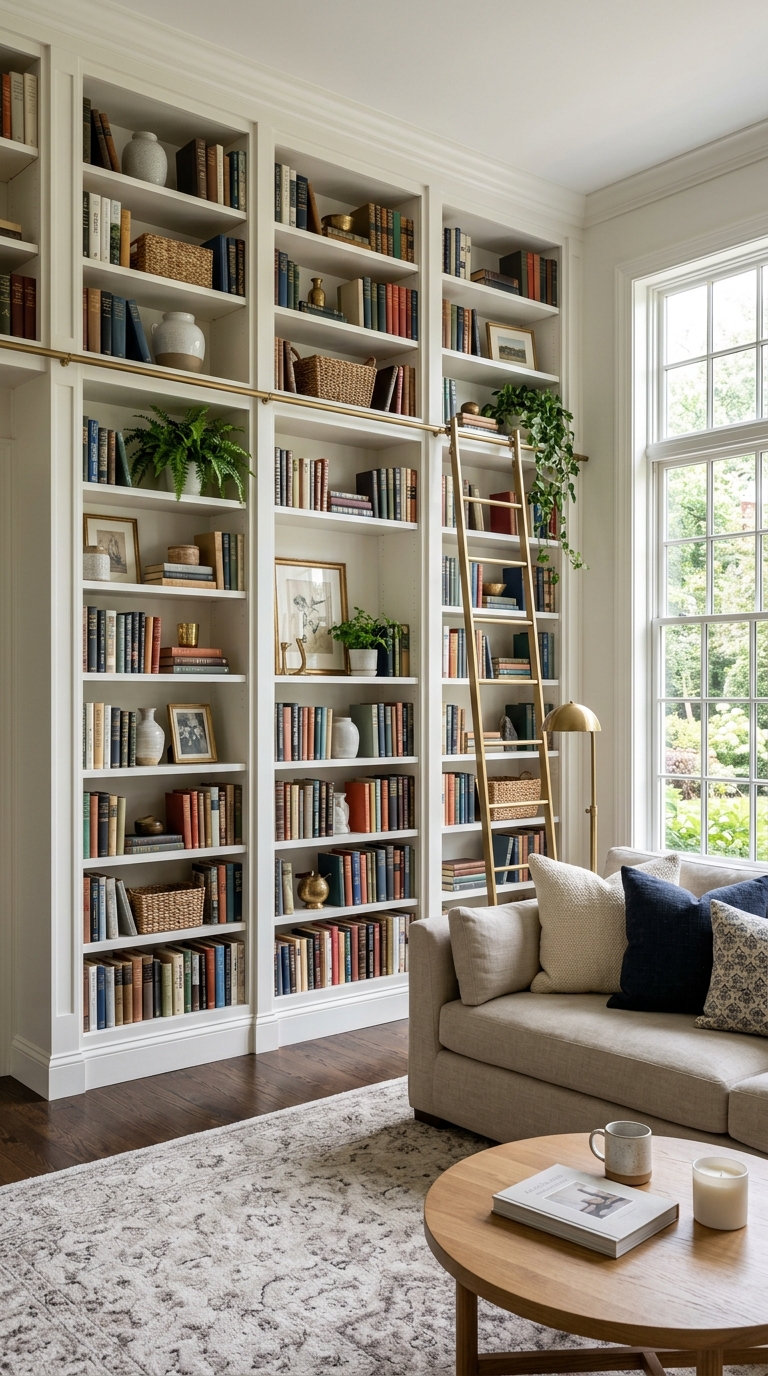
Built-in bookshelves can completely change how a living room feels, but they’re usually expensive to install. That’s where IKEA Billy bookcase hacks come in—they make it possible to get that same custom built-in look without spending a fortune.
With a few simple adjustments, basic shelves can be turned into floor-to-ceiling storage that looks like it was designed for the space. It works well for framing a fireplace, building a reading wall, or adding storage in smaller rooms where space is limited.
The Cost of Custom Built-Ins
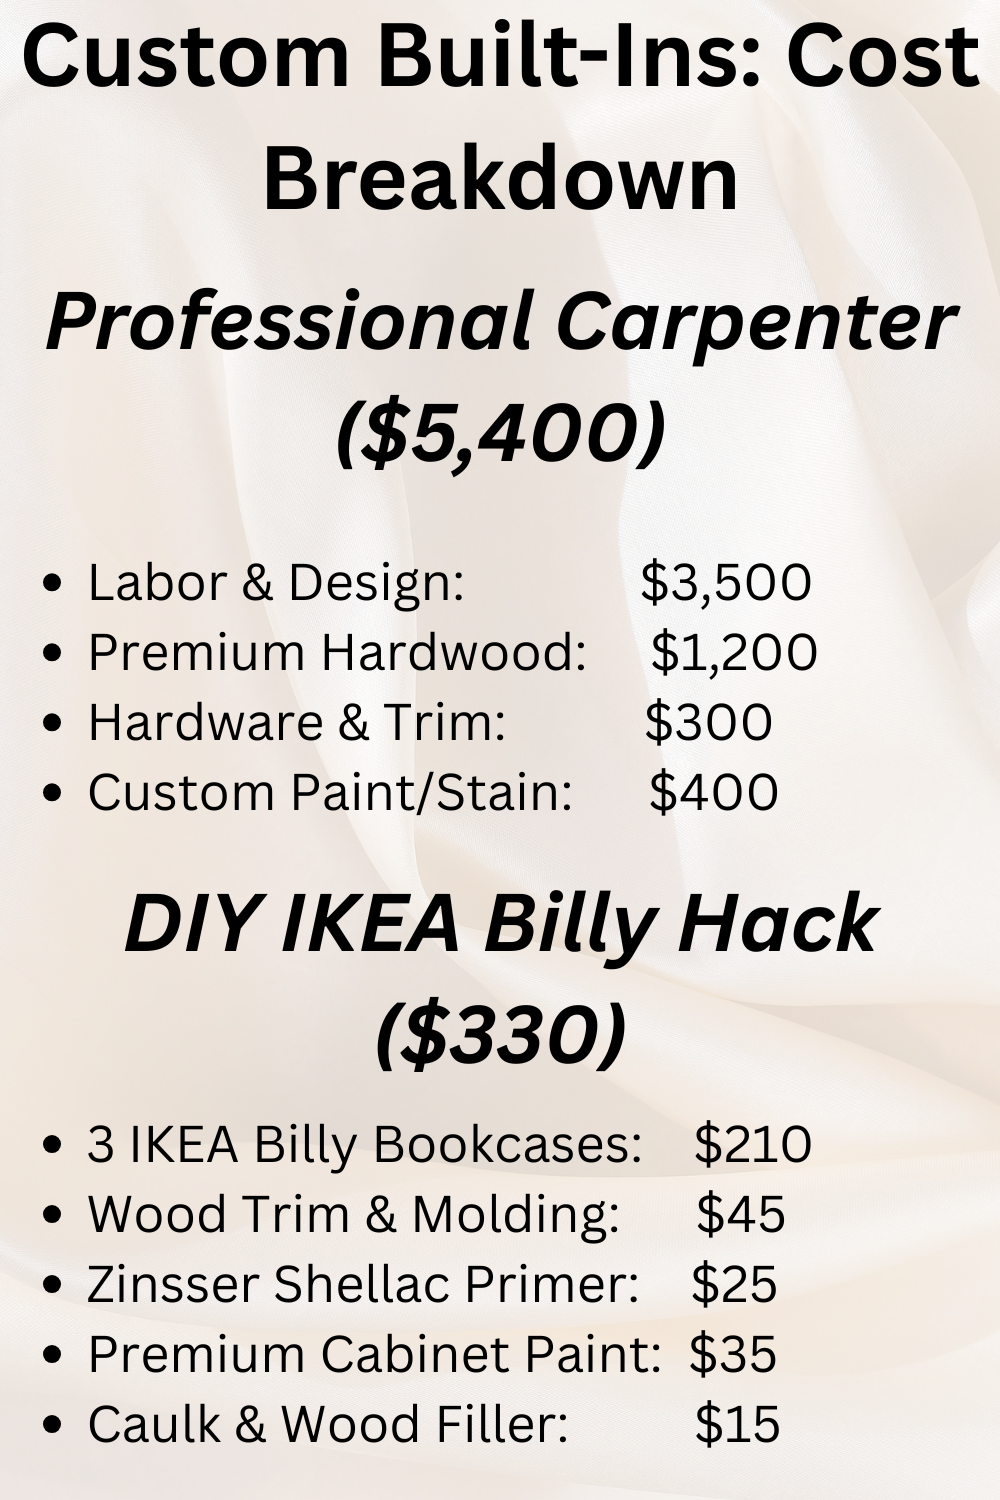
Getting custom built-in bookshelves made by a carpenter can be expensive. In the US, prices often range from about $3,000 to $8,000 depending on the size of the wall and the materials used. For many homeowners and renters, that kind of cost makes the idea unrealistic.
IKEA Billy Bookcase Hacks as an Alternative
That’s where IKEA Billy bookcase hacks become useful. Instead of starting from scratch with custom woodwork, you can use affordable, ready-made shelving as your base and build around it. With the right setup, it’s possible to achieve a built-in look that feels intentional and high-end, without the cost of custom cabinetry.
The Secret to a High-End Look
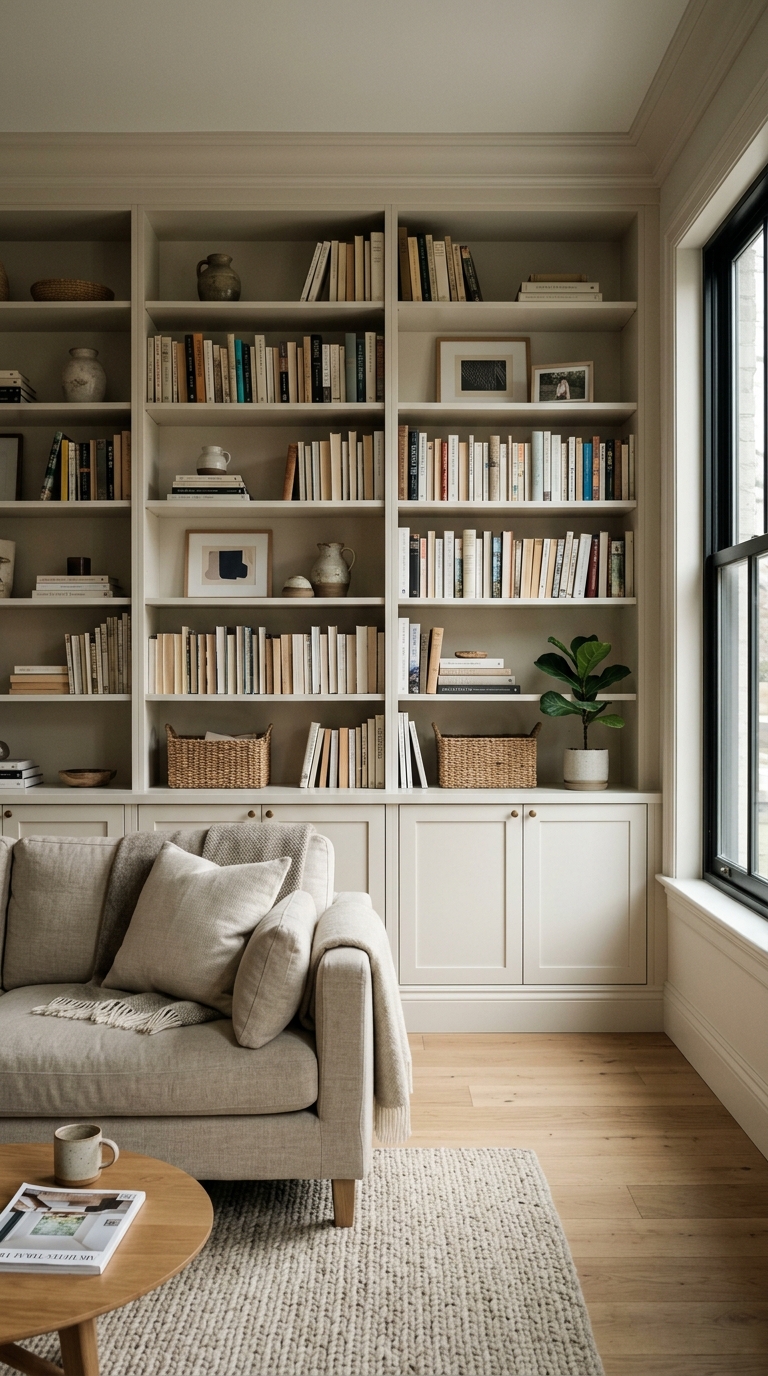
What makes a built-in setup look expensive is how well it’s finished. Simply lining up a few bookcases against a wall will always look temporary. The real difference comes from closing gaps, aligning edges, and making the units feel like they were built into the room itself.
This kind of project can feel intimidating at first, especially if you have not done much DIY work before. But it does not require advanced woodworking skills or professional tools. Basic measuring, simple hand tools, and careful finishing work are usually enough to achieve a clean, built-in effect.
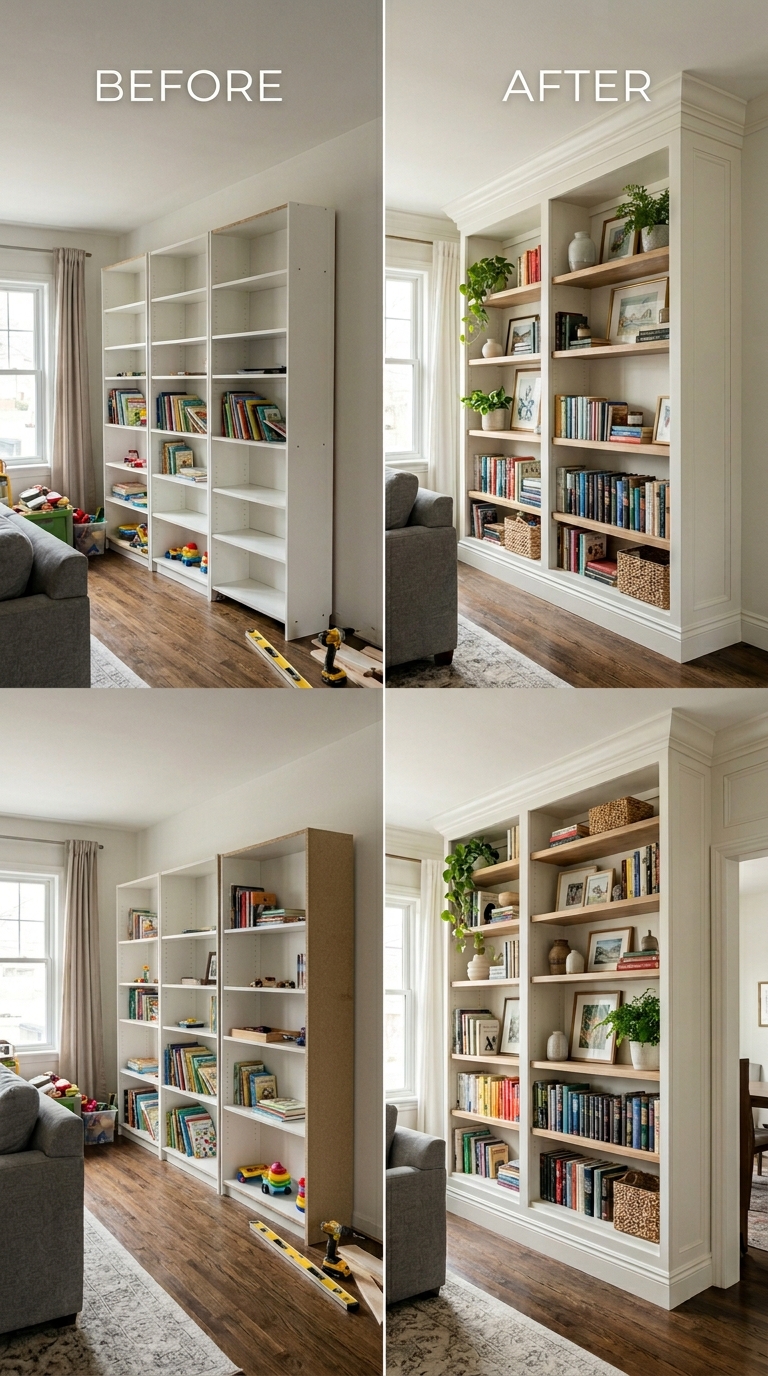
Using basic wood trim, framing pieces, and a good coat of paint, you can turn simple particle board shelving into a built-in feature wall. The key is in how the edges are finished and how well the units are blended into the wall and surrounding space.
This guide walks through the process step by step, from choosing materials and securing the base units, to finishing techniques that help hide the original laminate look. The goal is to make the shelves feel permanent, seamless, and designed for the room.
IKEA Billy Bookcase Hacks: Planning, Tools, and Materials Guide
Before buying any materials, it is important to plan your space properly. Most built-in style projects succeed or fail at this stage. Incorrect measurements can lead to gaps, poor alignment, or shelving that does not sit flush against the wall.
Start by measuring the width of your wall in three places: the bottom, middle, and top. Walls are rarely perfectly straight, especially in older homes, so these measurements may vary slightly. Always use the smallest measurement when planning your layout to avoid fitting issues when installing the shelves.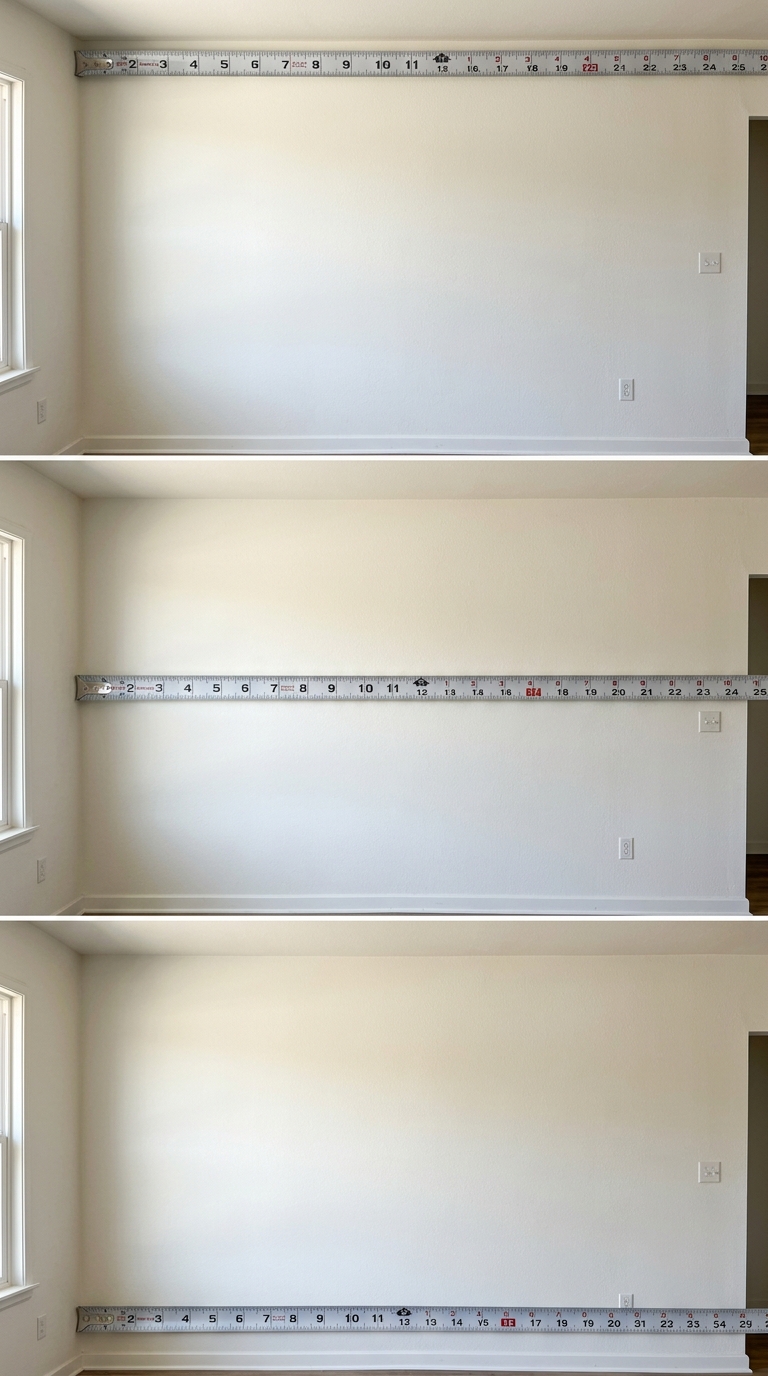
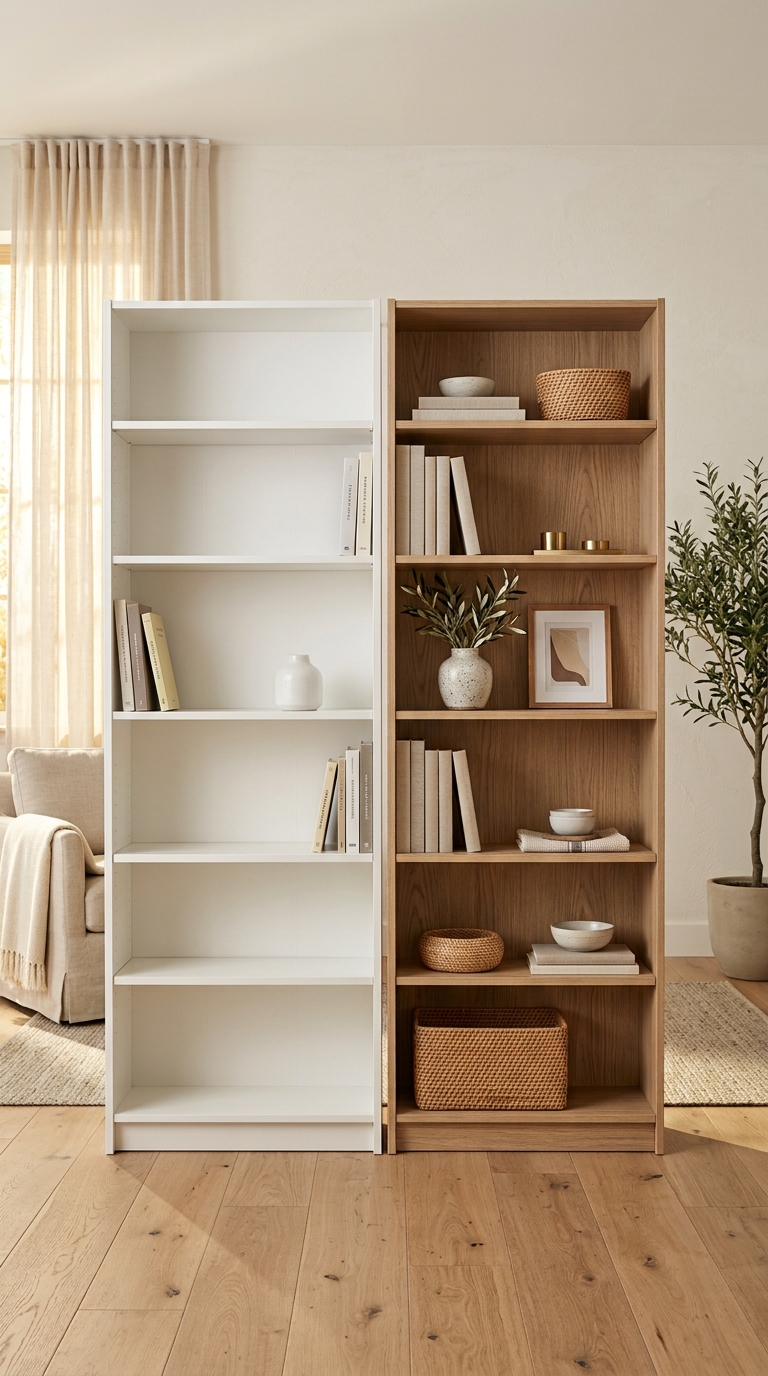
Once you have your measurements, you can choose the right IKEA Billy bookcase setup for your space. The shelves come in different widths and heights, including a standard width and a narrower option, as well as full-height and shorter versions. Extension units are also available if you need extra height for taller walls.
At this stage, it helps to sketch your wall layout and experiment with different combinations. The goal is to get as close as possible to a wall-to-wall fit so the final result looks built-in rather than placed.
Tools Needed for IKEA Billy Bookcase Hacks
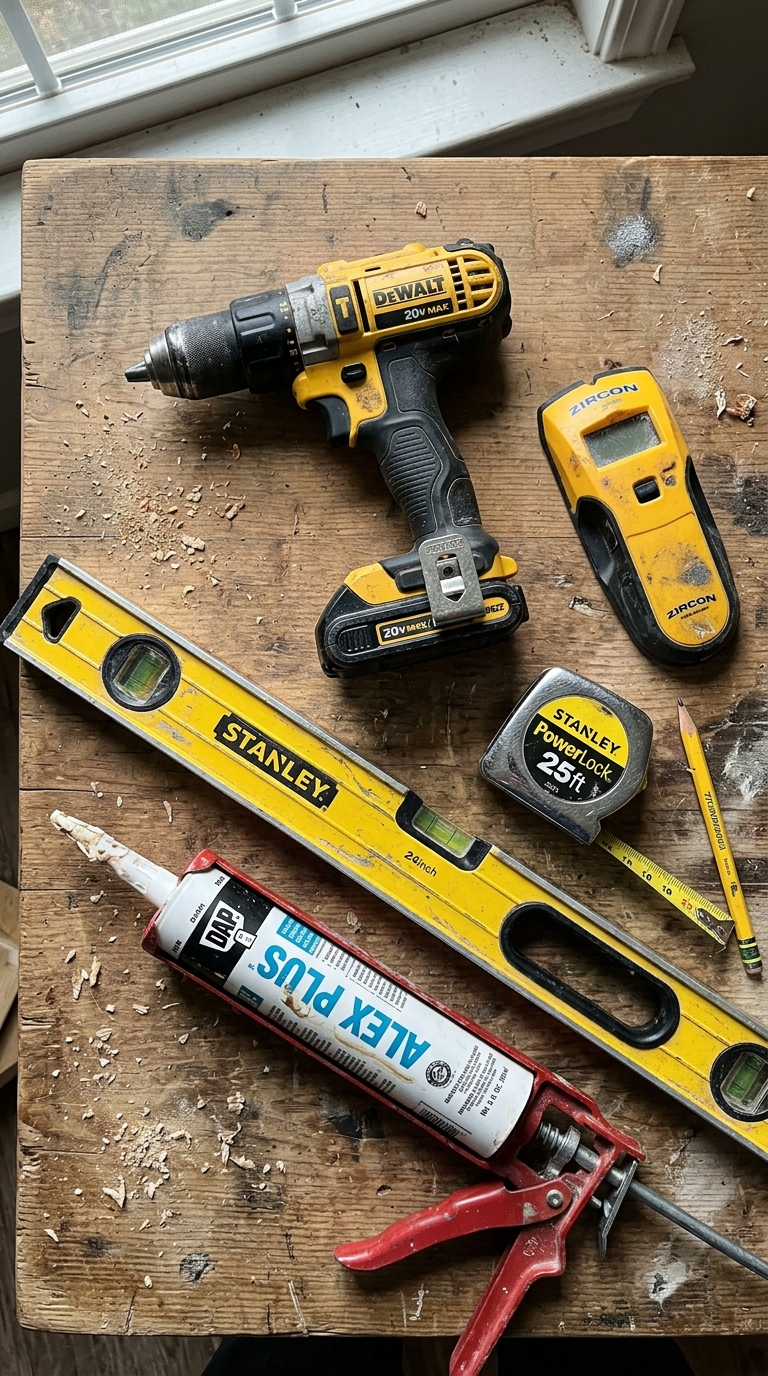
You do not need professional contractor tools for this project. Most of what you need is basic DIY equipment, and many items are commonly found in home toolkits.
Stud Finder
Essential for locating wall studs. Since built-in shelves carry heavy loads, securing them into studs is important for stability.
Spirit Level (at least 2 feet long)
A longer level helps ensure the units are straight and aligned properly, both horizontally and vertically.
Cordless Drill + Driver Bits
Used for assembling the bookcases and securing them to each other and into wall studs.
Brad Nailer or Hammer + Finishing Nails
Useful for attaching trim pieces. A brad nailer makes the job faster, but a hammer works if you are on a budget.
Caulk Gun
Used with paintable caulk to seal small gaps between trim and shelving for a cleaner, built-in finish.
Essential Materials and Supplies List
-
- 1×2 and 1×3 Common Wood Boards: These are cheap wood strips. You will nail them over the gaps where two bookcases meet. Consequently, they cover the ugly raw edges and create the illusion of a single, thick, custom wood frame.
- Crown Molding and Baseboard Trim: You will want to match your existing home trim as closely as possible. Therefore, your shelves will look like they flow naturally out of your floor and into your ceiling.
Finishing Supplies for IKEA Billy Bookcase Hacks
Wood Filler and Paintable Caulk:
Wood filler is used for solid joints, while caulk is used for corners and gaps where the shelving meets the wall.
Shellac-Based Primer:
This step is essential for IKEA’s smooth laminate surface. A bonding primer like Zinsser BIN link helps paint adhere properly and prevents peeling.
High-Quality Cabinet Paint:
Use a durable cabinet or trim paint instead of standard wall paint. It creates a harder finish that holds up better to regular use and friction.
Preparing the Wall and Baseboards
Before installing the bookcases, the wall area needs proper preparation. One common issue is baseboards, which prevent the shelves from sitting flush against the wall.
Dealing with Baseboards for IKEA Billy Bookcase Hacks
Baseboards typically extend slightly from the wall, which creates a gap behind standard bookcases. If left in place, this gap will make the setup look temporary rather than built-in.
To fix this, there are two common approaches. You can either remove the section of baseboard where the shelves will sit or build a simple platform base to raise the bookcases above the trim. Both methods help the units sit flush and create a cleaner, built-in appearance.
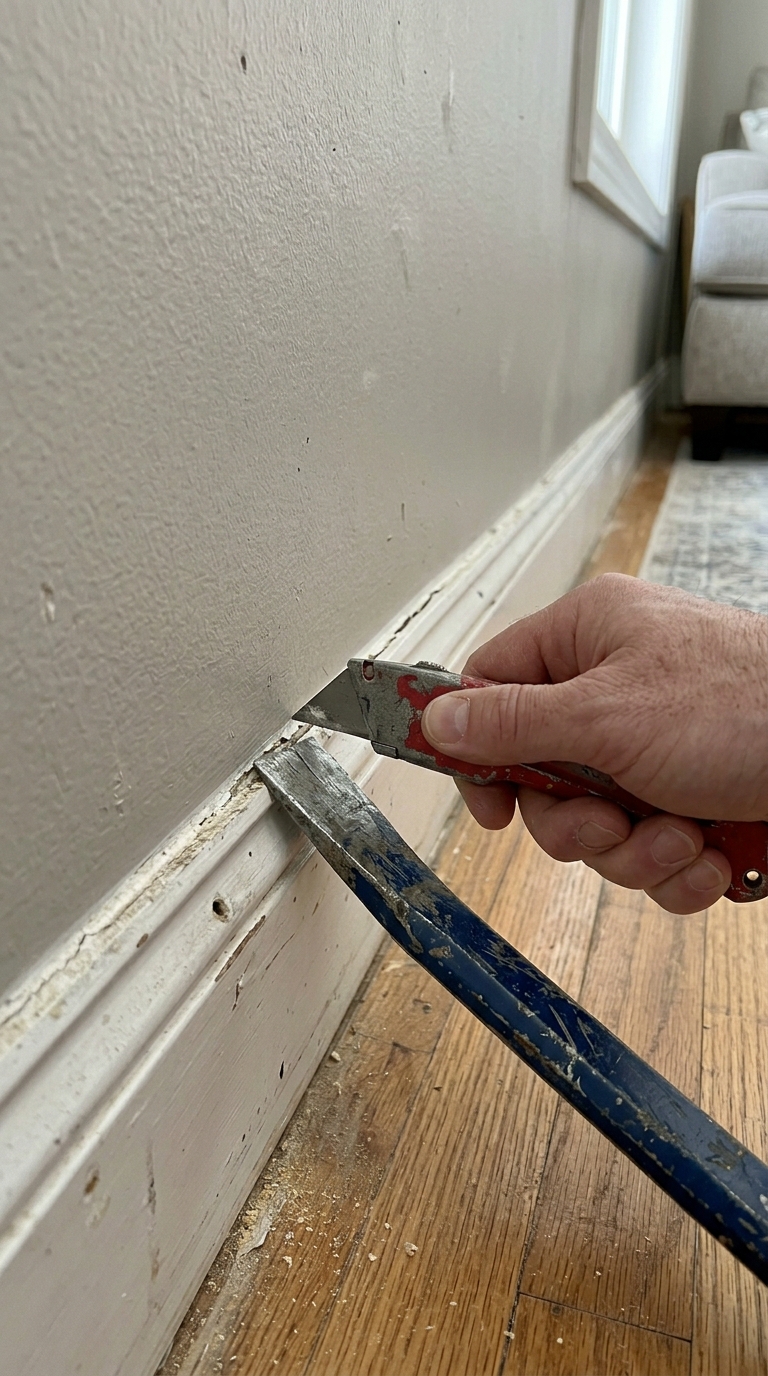
For most homes, removing the section of baseboard is the cleanest option. Start by cutting through the caulk line along the top edge using a sharp utility knife. This prevents damage to the drywall when the trim is removed.
Once the caulk is cut, gently pry the baseboard away from the wall using a trim puller or small crowbar. Work slowly to locate and release the nails holding it in place.
Outlet Considerations for IKEA Billy Bookcase Hacks
After adjusting the baseboards, check the location of wall outlets. In many living rooms, at least one outlet will likely fall behind the bookcase layout. If this is not planned for, you may lose access to useful power sources for lamps, chargers, or electronics.
When planning your layout, make sure you account for any outlets so they remain accessible or are safely integrated into the design.
Cutting the Bookcase Back Panel
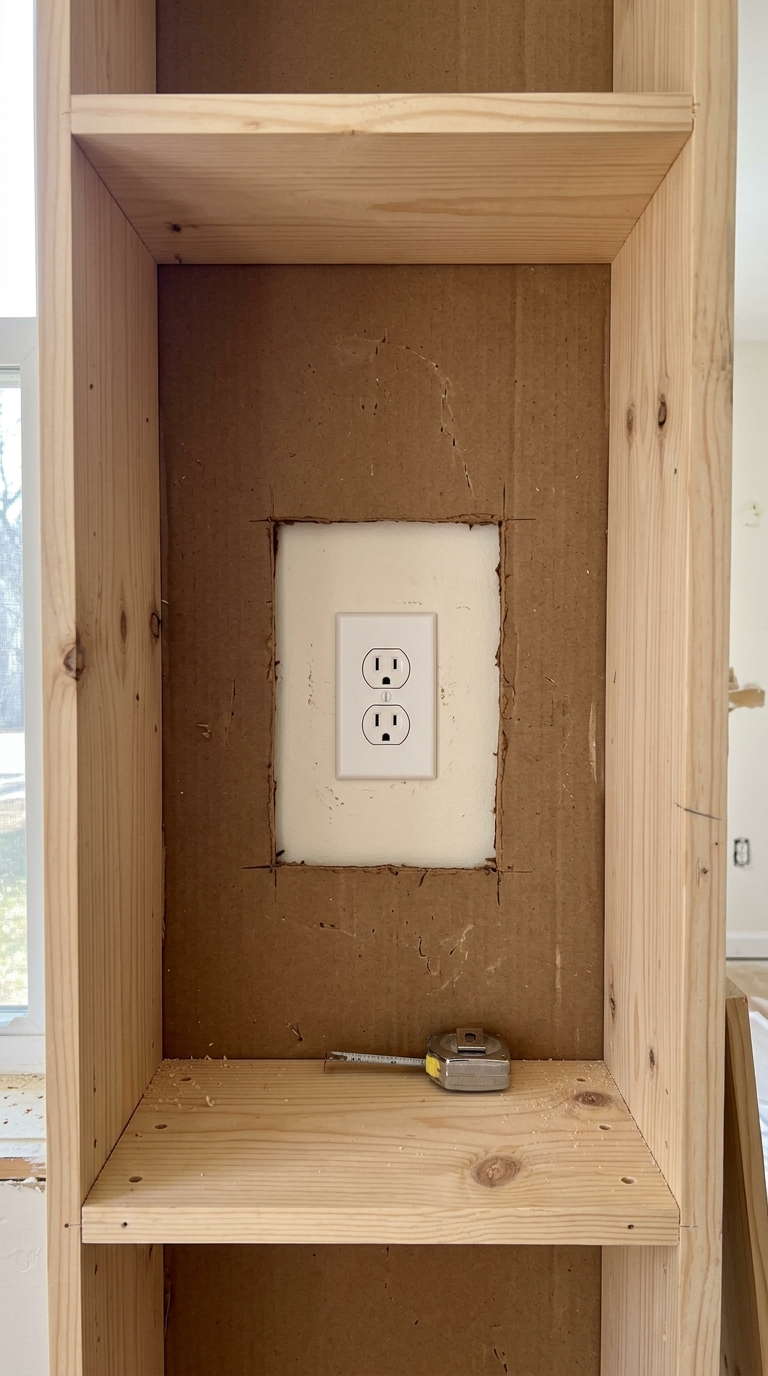
Assemble the outer frame of the Billy bookcase, but do not attach the backing yet. Position the frame against the wall where it will be installed, then mark the location of any wall outlets on the back panel.
Remove the panel and cut out a neat opening using a utility knife or small saw, following your markings. Once reattached, the outlet will remain accessible through the back of the shelving.
Installing and Anchoring Your IKEA Billy Bookcase Hacks
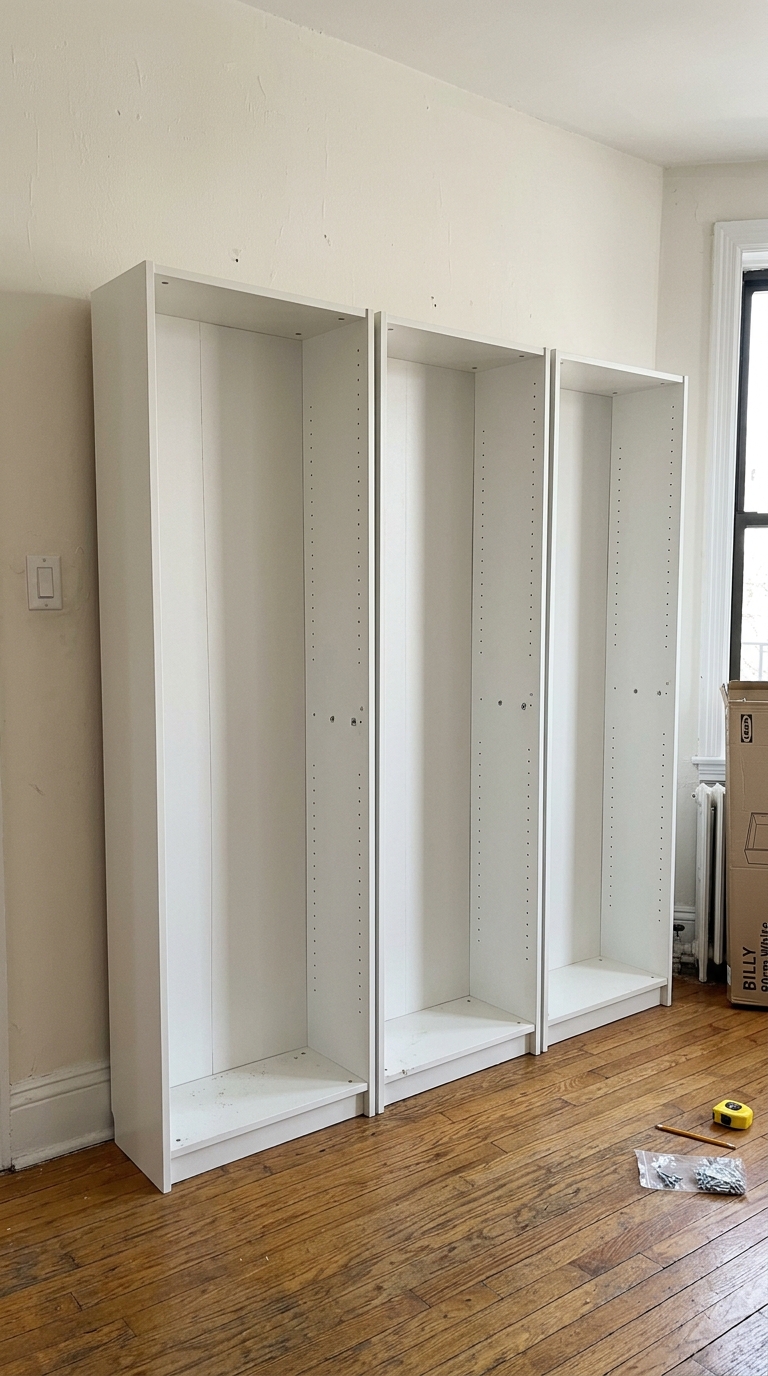
With the wall prepared, begin assembling the IKEA Billy bookcases according to the manufacturer’s instructions. At this stage, you can leave out the adjustable shelves to make the units lighter and easier to handle during installation.
Focus on building the outer frame, fixed shelf, and base panel. This makes it easier to position and align the units against the wall before securing them.
Leveling and Anchoring the Bookcases
Once assembled, slide the bookcases into position against the wall. Use a long spirit level to check that the units are straight across the top and aligned at the front. Floors and walls are rarely perfectly even, so small adjustments are usually needed.
If the units are uneven, use wooden shims under the base corners to correct the level. Adjust until the bubble is centered, then trim any excess shim material so it sits flush with the base.
After leveling, secure the bookcases to the wall using appropriate anchors. This step prevents the units from tipping and ensures they remain stable under load.
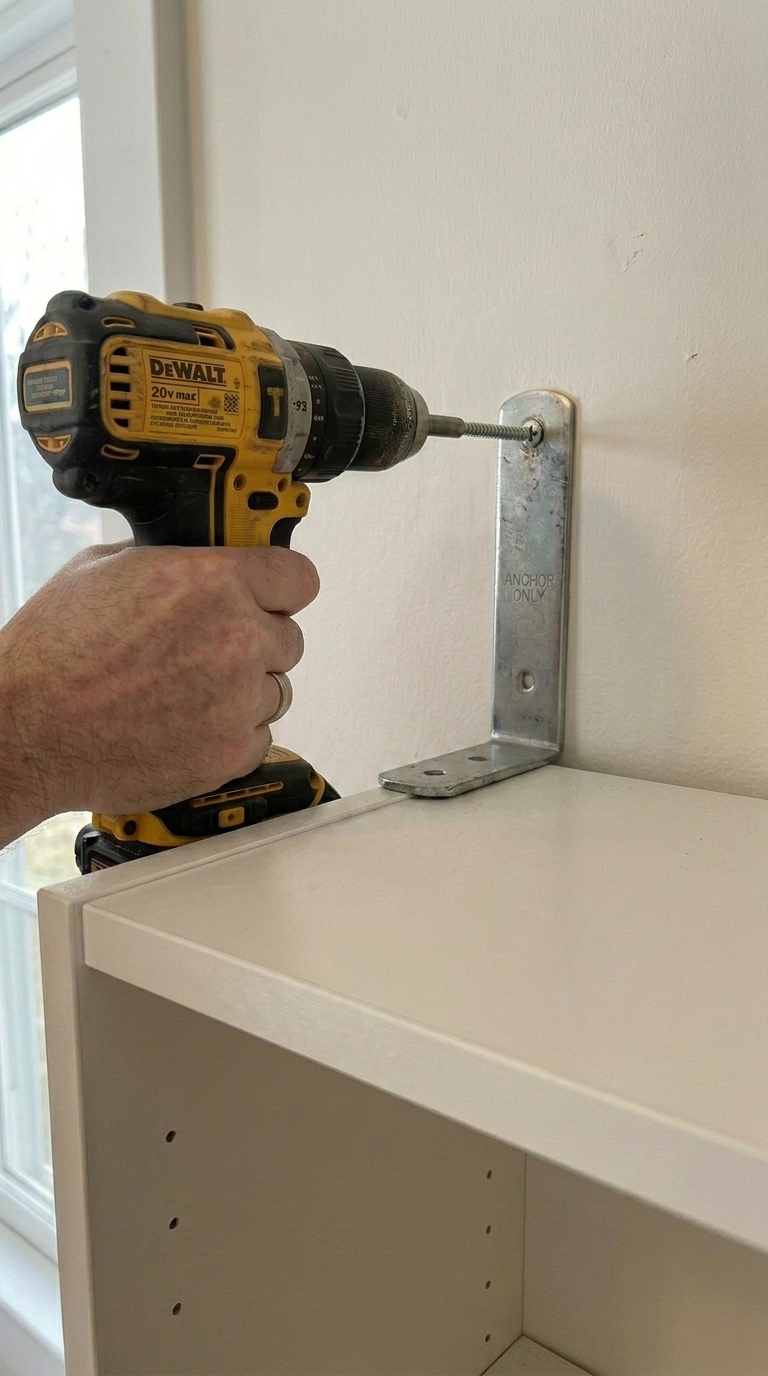
Use a stud finder to locate wall studs above the bookcases and mark their positions with a pencil. Then use a cordless drill to secure the top anchoring brackets into the studs with 2.5-inch wood screws.
If a bracket does not align with a stud, use heavy-duty wall anchors or toggle bolts designed for drywall support instead of standard plastic anchors. This helps keep the unit firmly secured to the wall.
Securing the Bookcases Together
To form a single built-in unit, clamp the bookcases tightly side by side so the edges align cleanly. Then drive 1.25-inch wood screws through the inner side panels of one unit into the next.
Space the screws at the top, middle, and bottom, positioning them where shelves will later cover them for a cleaner finish.
Finishing Details for IKEA Billy Bookcase Hacks
At this stage, the shelves will still look like standard flat-pack units, but trim work is what transforms them into a built-in feature.
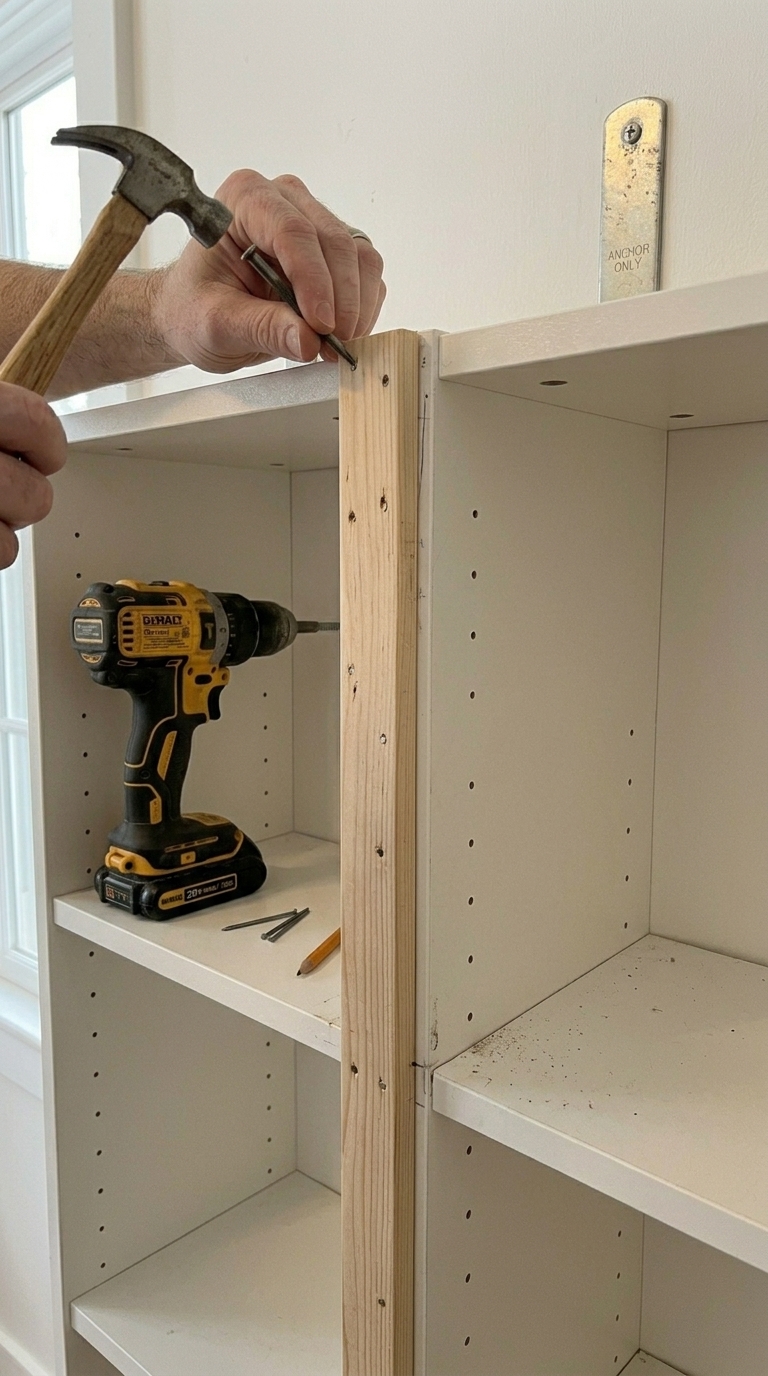
Start with vertical trim pieces. Measure the height from the base of the bookcase to the top frame, then cut 1×2 boards to size using a miter box or saw.
Attach the boards over the seams where two bookcases meet, securing them with a brad nailer or finishing nails. This helps cover visible edges and creates a more continuous, built-in appearance.
Adding Crown Molding and Top Trim
If there is a gap between the top of the bookcases and the ceiling, measure it and cut an MDF or wood board to fill the space. Secure it flush with the top of the shelving, then install crown molding where the new header meets the ceiling. This helps the unit blend into the room as a single built-in structure.
Hiding the Shelf Pin Holes
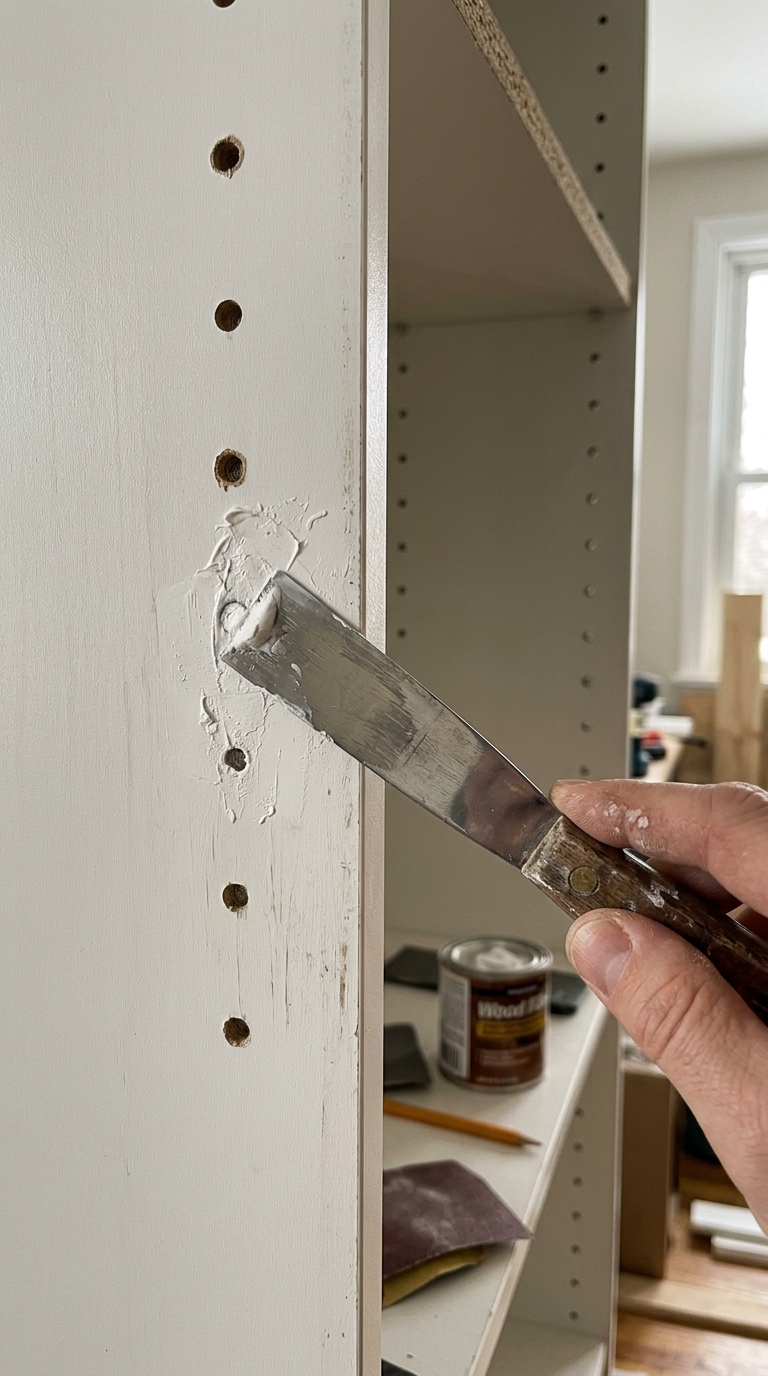
Caulking the Joint Seams
After sanding, use a caulk gun to apply a thin bead of paintable caulk along all trim joints and where the shelving meets the wall. Smooth the line with a damp finger or tool for a clean finish. This helps close small gaps and creates a more seamless appearance.
Priming the Laminate Surface
Before painting, apply one to two coats of a shellac-based primer such as Zinsser BIN. IKEA laminate is smooth and does not hold standard paint well, so a bonding primer is necessary to help the top coat adhere properly and prevent peeling.
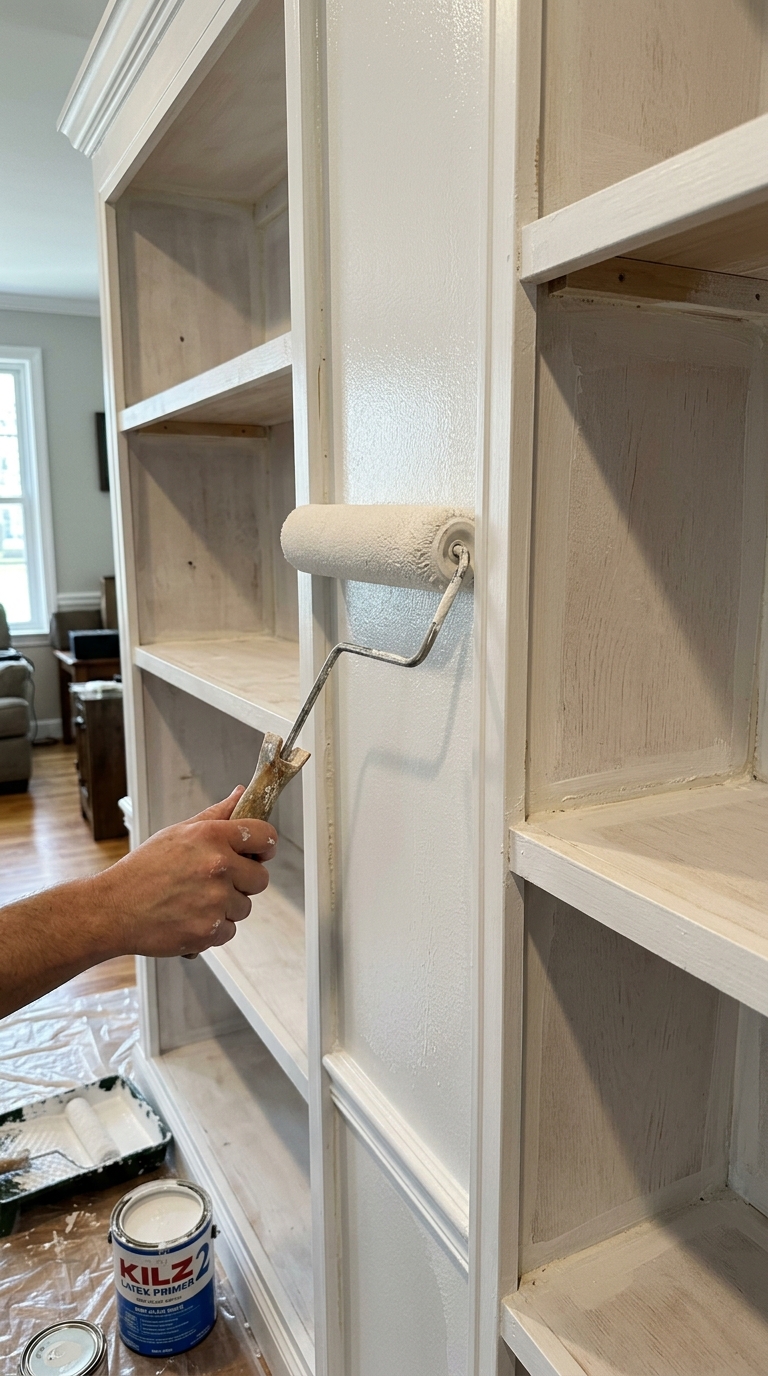
Applying the Top Paint Coat
Once the primer is fully dry, apply two coats of a durable trim or cabinet paint. For a more built-in effect, match the shelf color to your wall color and finish.
Use a synthetic brush for corners and a small foam or microfiber roller for flat surfaces to keep the finish smooth and even. Allow the paint to cure fully for 48–72 hours before placing items on the shelves.
Bringing Your Dream Custom Library to Life
Taking on a major furniture transformation project like this can feel intimidating. This is especially true when you look at flat-pack boxes on your living room floor. However, breaking it down step by step allows anyone to trade massive contractor bills for a beautiful feature wall.
The secret lies entirely in the finishing details. Taking the time to remove baseboards transforms budget shelving into true custom carpentry. Furthermore, hiding the seam lines with trim and filling the tiny pre-drilled peg holes completely erases the manufactured look. Once your structure is complete, these IKEA Billy bookcase styling ideas can help you arrange shelves like a professional designer.
Styling Your Finished Bookshelves
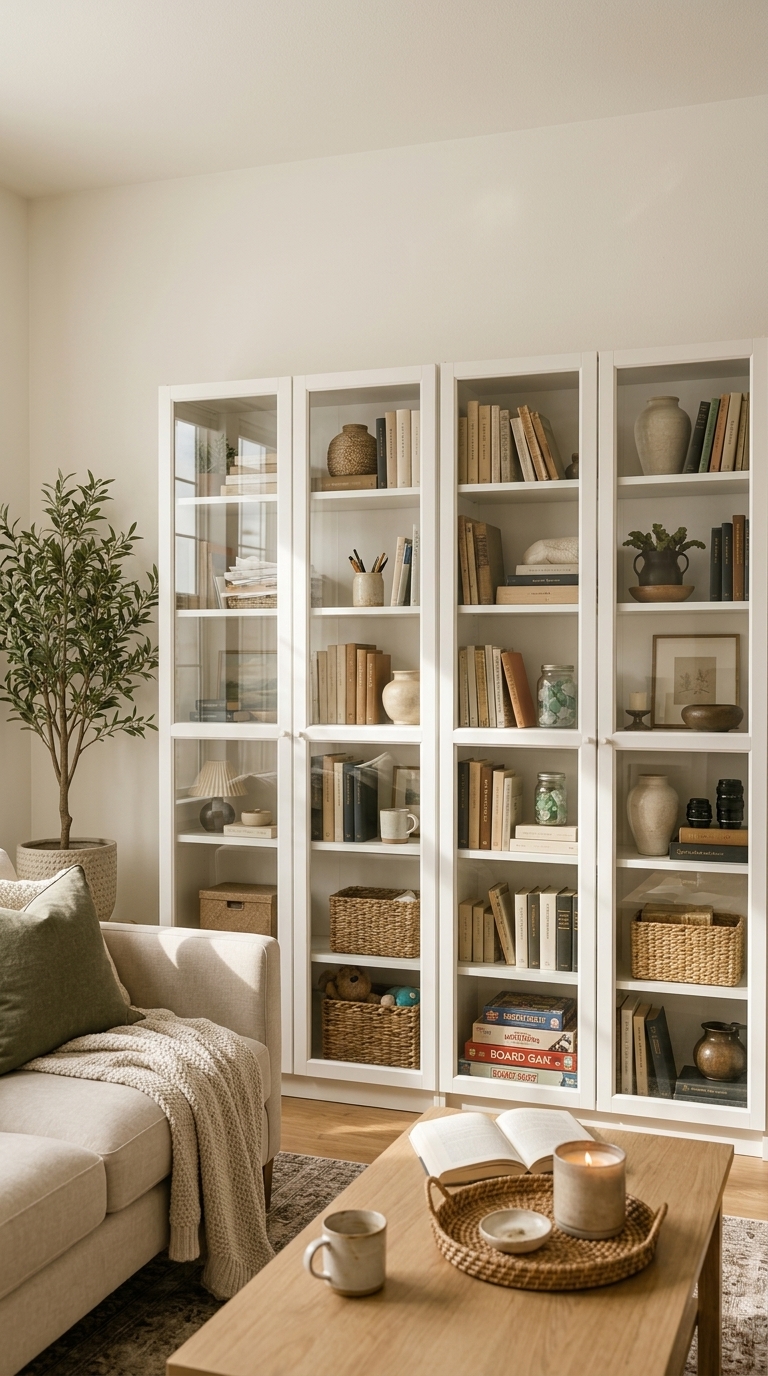
Once the paint has fully cured, the final step is styling your built-in shelves. Start simple by combining books with storage baskets, a few plants, and a mix of personal decor pieces like ceramics or framed photos.
The goal is to keep things balanced so the shelves feel intentional without looking overcrowded.
For more shelf styling inspiration, you can explore our IKEA Billy bookcase styling ideas guide.
Frequently Asked Questions about IKEA Billy Bookcase Hacks
Are IKEA Billy bookcases strong enough for built-in shelves?
Yes, when properly anchored into wall studs or secured with heavy-duty wall anchors, they can safely hold books, decor, and storage items.
How do you make IKEA Billy bookcases look custom-built?
The key is adding trim, crown molding, and baseboards, then painting everything the same color as the wall so the units blend into the room.
Do you need to remove baseboards for IKEA built-ins?
Not always. You can either remove sections of baseboard or build a platform base so the bookcases sit flush against the wall.
What paint works best on IKEA Billy bookcases?
A shellac-based primer should be applied first, followed by durable cabinet or trim paint for a long-lasting finish.
How do you fill gaps between IKEA bookcases?
Gaps are typically covered using wood trim or filler strips, then sealed with caulk for a seamless appearance.
Can you install IKEA Billy bookcases around wall outlets?
Yes. The back panel can be cut to allow access to outlets while keeping the shelves flush against the wall.
How much does an IKEA Billy built-in hack cost?
Most DIY versions cost between a few hundred dollars to around $1,000 depending on trim, paint, and number of units used.