10 Easy Christmas Crafts for Kids to Make at Home
Christmas is a lovely time to slow down and make something together. These easy Christmas crafts for kids use simple, affordable supplies and give little ones a chance to enjoy making something special at home.
From handmade decorations and Christmas cards to gift tags and keepsakes, there are projects for different ages and abilities. Younger children can join in with adult help, while older kids can complete more steps independently.
Each project includes an approximate age range, preparation time and mess level, so you can choose an activity that fits your afternoon without creating unnecessary stress.
Setting Up for Easy Christmas Crafts for Kids
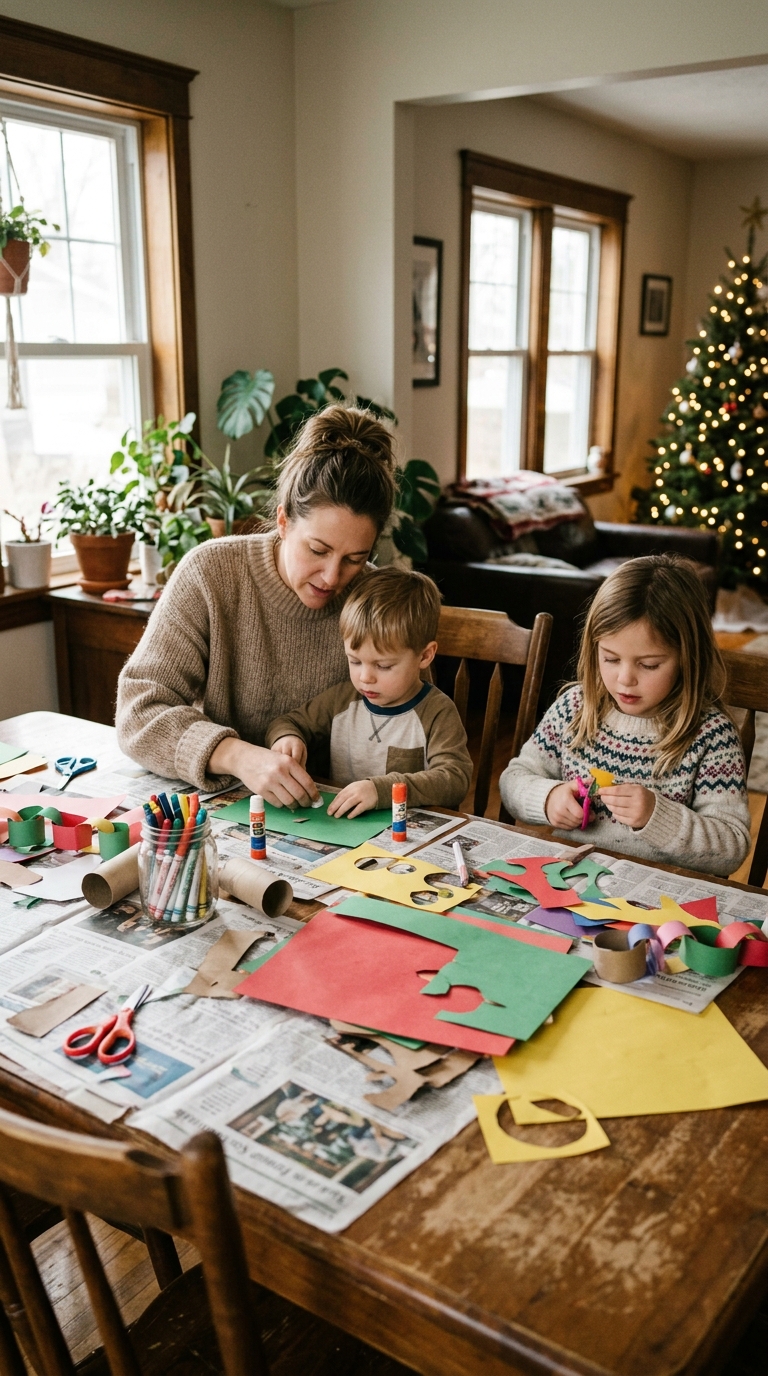
You don’t need a dedicated craft room. A kitchen table or cleared section of the dining table is enough.
A little preparation makes these Christmas activities easier for children to enjoy and easier for you to clean up afterward.
Before starting:
- Cover the surface with newspaper, a washable tablecloth or scrap paper.
- Put out only the supplies needed for that project.
- Keep child-safe scissors, glue sticks and washable paints within reach.
- Have a damp cloth and a small rubbish bowl nearby.
- Let children wear old clothes or an apron if paint or glue is involved.
A few simple supplies are all you need to get started with Christmas crafts for children, and preparing them beforehand makes the afternoon much easier.
For younger children, prepare any cutting, tracing or small details in advance. This helps them participate without becoming frustrated by difficult steps.
1. Torn-Paper Christmas Tree
Age: 3+ with supervision | Time: 15–20 minutes | Mess: Low
Materials:
- Green construction paper
- White or coloured cardstock
- Glue stick
- Small pieces of red, yellow and other coloured paper
- Crayons or markers
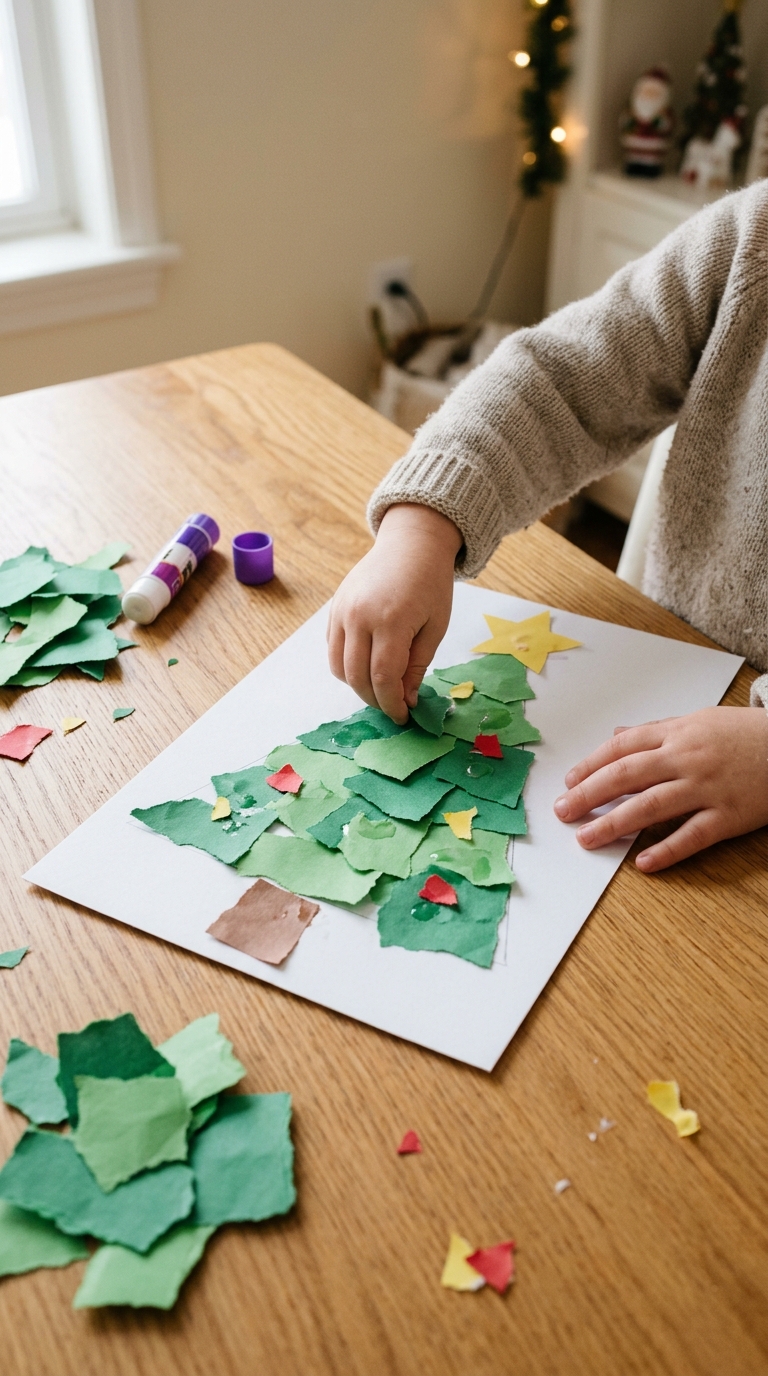
This is a good first Christmas project for preschoolers because it uses tearing rather than precise cutting. Children can make their own tree and decorate it however they like.
How to make it:
- Draw a large triangle on a sheet of cardstock to mark the tree shape.
- Give your child green paper to tear into small pieces.
- Spread glue inside the triangle and stick the green pieces down until the shape is covered.
- Tear or cut small coloured paper pieces for decorations.
- Add a paper star at the top and a small brown rectangle for the trunk.
Make it easier: Draw the tree outline clearly so younger children know where to place the paper.
Display idea: Write your child’s name and the year on the back. You can keep the finished picture with your other Christmas keepsakes.
2. Fingerprint Christmas Lights Card
Age: 3+ with supervision | Time: 15 minutes, plus drying time | Mess: Medium
Materials:
- White or cream cardstock
- Washable, child-safe paint
- Black marker
- Small paint palette or paper plate
- Baby wipes or a damp cloth
A handmade Christmas card is a thoughtful way for children to send holiday greetings to grandparents, relatives or friends. Fingerprint lights are simple enough for little hands, and each card turns out differently.
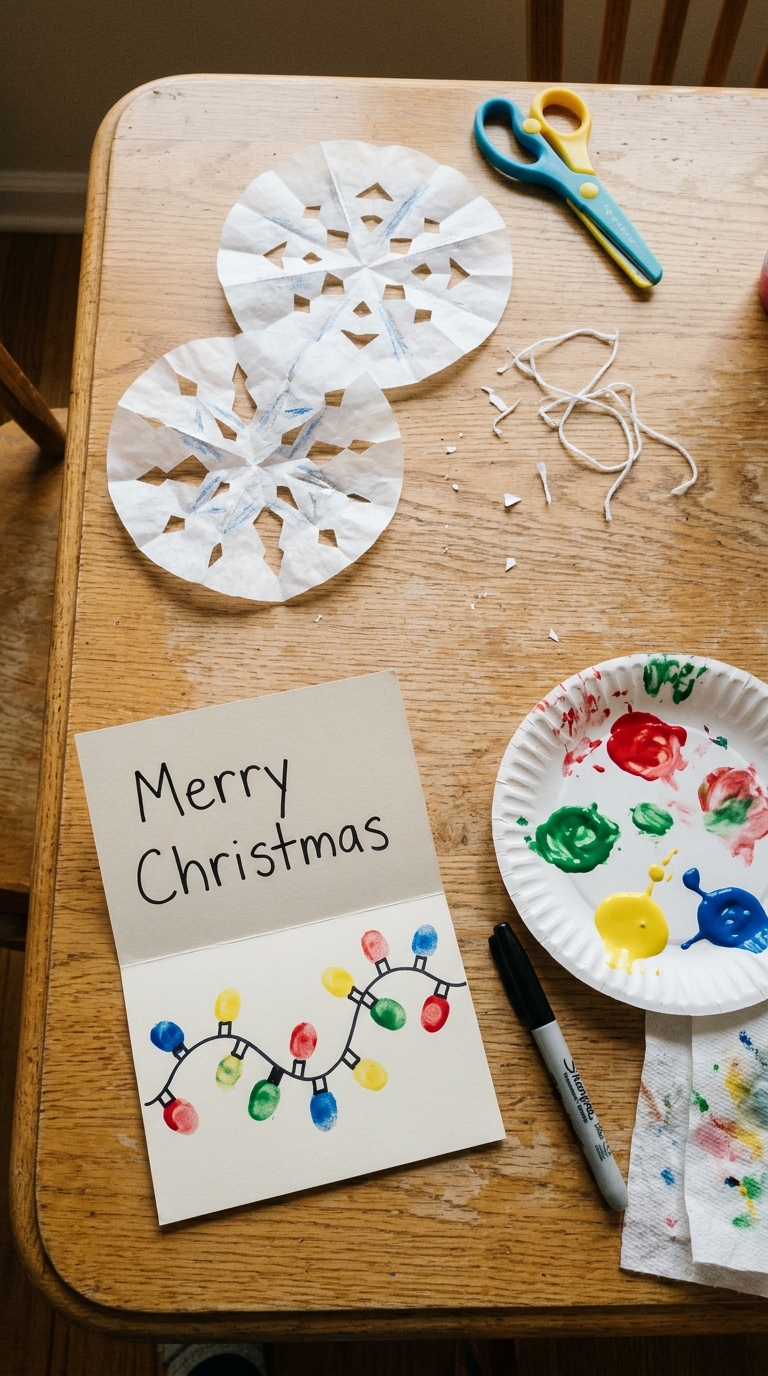
How to make it:
- Fold a piece of cardstock in half to create a card.
- Draw a loose, wavy line across the front with a black marker.
- Let your child dip a fingertip into washable paint.
- Press fingerprints along the line, leaving a little space between each one.
- Use the marker to add small light sockets beneath the fingerprints.
- Allow the paint to dry before writing a message inside.
Make it personal: Add a short greeting such as “Merry Christmas!” and let your child sign their name.
Parent tip: Use just a few paint colours at a time. Too many colours can quickly turn into one muddy mixture.
3. Coffee-Filter Snowflakes
Age: 5+ with supervision | Time: 15–25 minutes | Mess: Low
Materials:
- White coffee filters
- Child-safe scissors
- Crayons or washable markers
- String or clear tape
Paper snowflakes are a classic winter decoration. Coffee filters are thin, easy to fold and simple for children to cut.
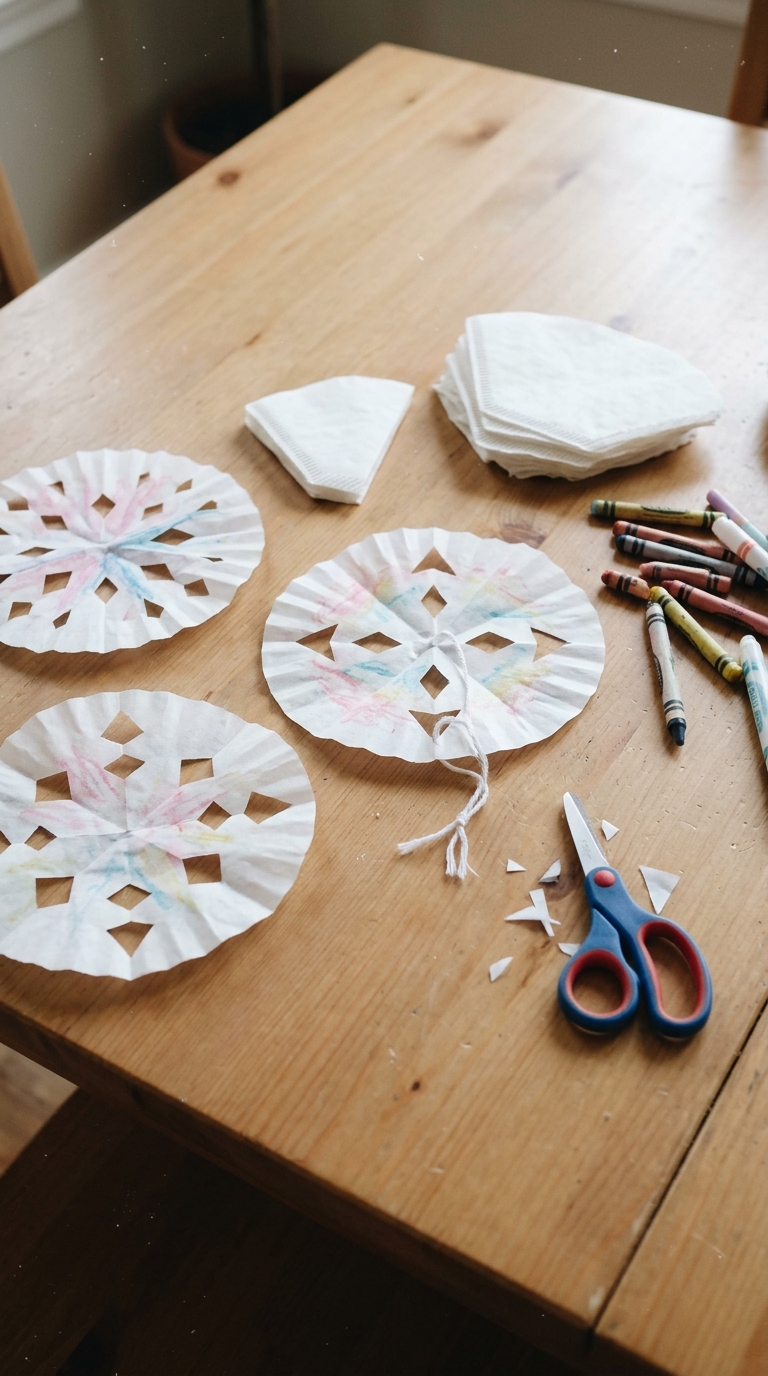
How to make it:
- Flatten a coffee filter and fold it in half.
- Fold it in half again, then once more to create a narrow wedge.
- Help your child cut small shapes along the folded edges. Avoid cutting all the way across the folded paper.
- Carefully unfold the filter to reveal the snowflake.
- Add a few coloured details if desired.
- Attach a piece of string or tape it to a window.
For younger children: Prepare the folded filters and let them make a few simple cuts with supervision.
Display idea: Hang several snowflakes at different heights in a window for a simple winter display.
4. Christmas Countdown Paper Chain
Age: 4+ with supervision | Time: 20–30 minutes | Mess: Low
Materials:
- Red, green and white construction paper
- Child-safe scissors
- Glue stick or tape
- Marker
A paper countdown chain gives children a small daily activity as Christmas approaches. It also makes use of inexpensive supplies you may already have at home.
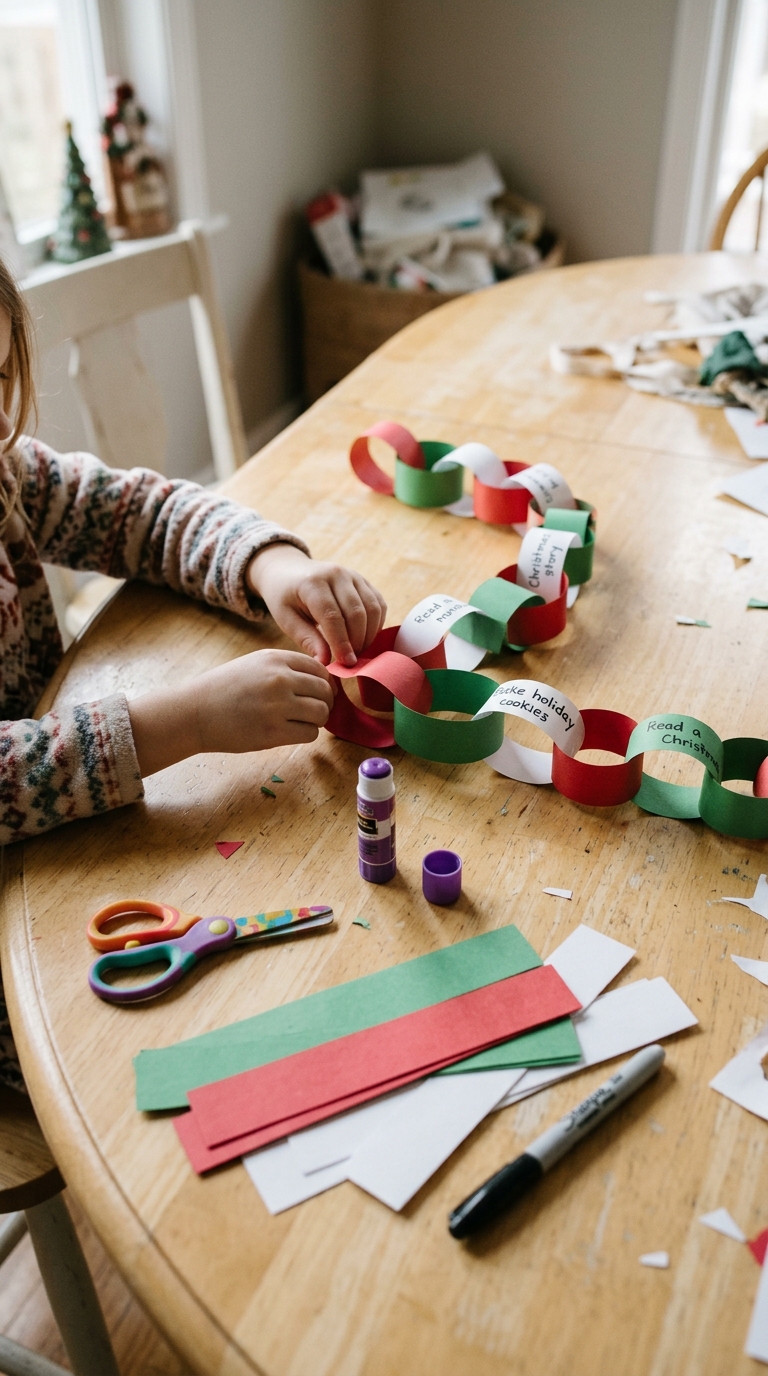
How to make it:
- Cut the construction paper into strips of roughly equal size.
- Decide how many days you want the chain to cover.
- Make the first strip into a loop and secure the ends with glue or tape.
- Thread the next strip through the first loop and secure it.
- Continue until the chain is complete.
- Hang it somewhere accessible, such as a bedroom door or wall hook.
Each day, your child can remove one loop as Christmas gets closer.
Make it more engaging: Write a simple activity on selected strips, such as reading a Christmas story, decorating cookies or calling a relative. Keep activities realistic for your family’s schedule.
5. Cardboard Tube Reindeer
Age: 4+ with supervision | Time: 20–25 minutes | Mess: Low to medium
Materials:
- Clean cardboard toilet paper tube
- Brown construction paper or washable brown paint
- Googly eyes or paper circles
- Red pom-pom or red paper
- Brown pipe cleaners or paper for antlers
- Glue
- Child-safe scissors
Instead of throwing away empty cardboard tubes, turn one into a little reindeer. This project is especially useful for children who enjoy making characters and pretend-play toys.
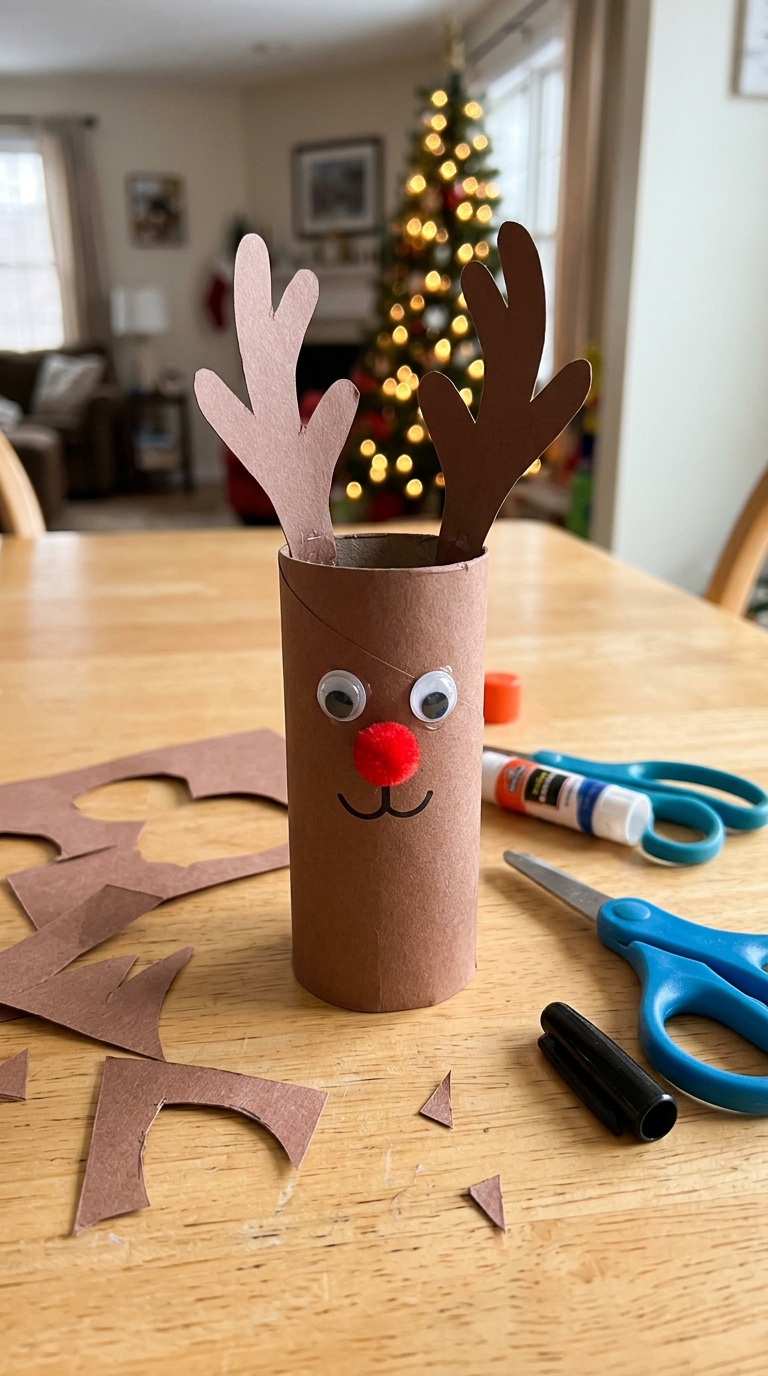
How to make it:
- Cover the cardboard tube with brown paper or paint it brown. Let paint dry completely.
- Glue two eyes near the top of the tube.
- Add a red pom-pom or a small red paper circle for the nose.
- Cut two simple antler shapes from brown paper.
- Attach the antlers to the back or inside the top edge of the tube.
- Draw a mouth and add any extra details your child likes.
For younger children: Prepare the antlers and small pieces beforehand. Adults should handle any sharp tools used to cut materials.
Play idea: Make a few reindeer and use them as characters for a Christmas story.
6. Salt Dough Christmas Ornaments
Age: 4+ with close adult supervision | Time: 20–30 minutes to prepare and shape, plus drying and baking time | Mess: Medium
If you’re looking for easy Christmas crafts for kids that can become family keepsakes, salt dough ornaments are worth trying.
Materials:
- 2 cups all-purpose flour
- 1 cup salt
- About ¾ cup water
- Rolling pin
- Christmas cookie cutters
- Drinking straw
- Baking tray
- Paint and string for decorating
Salt dough ornaments are a fun way to make decorations that can be brought out every Christmas. Children can choose the shapes and decorate them once they are completely dry.
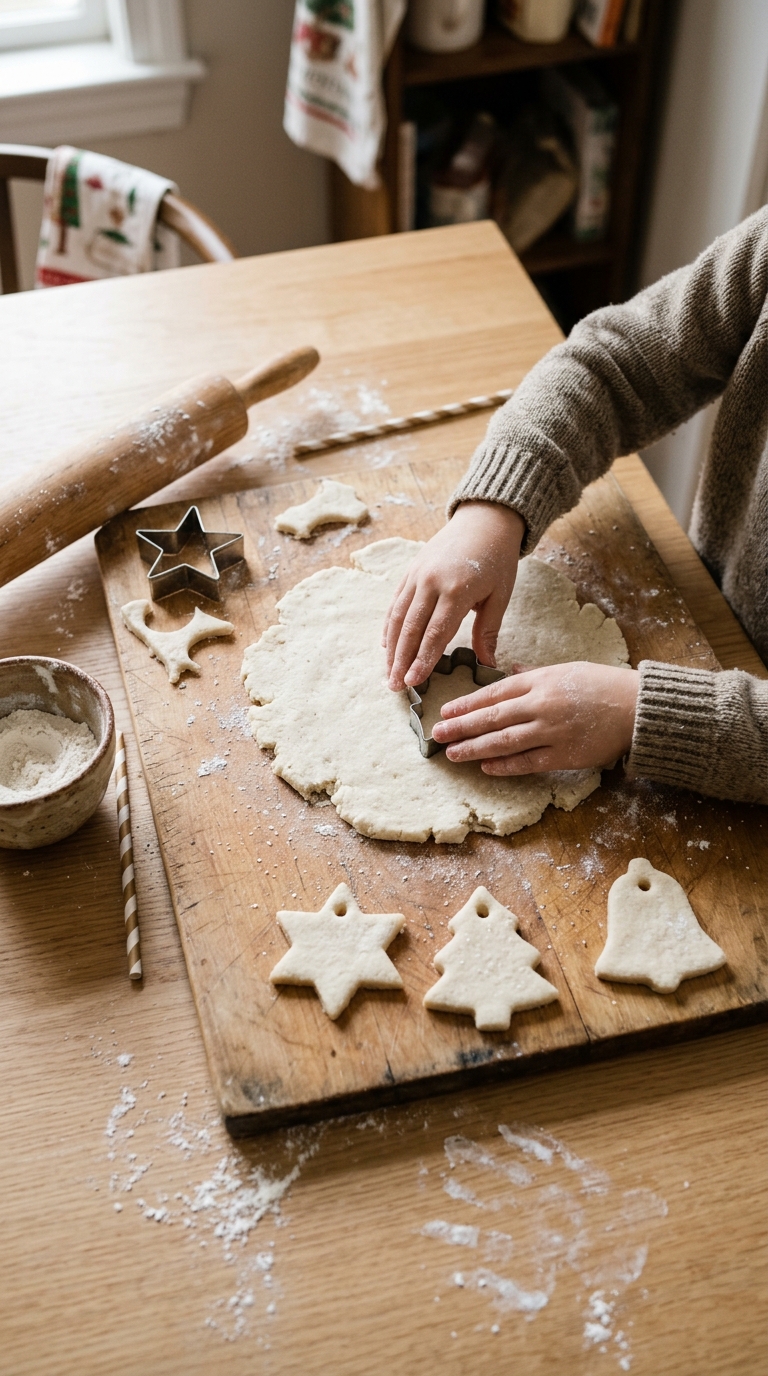
How to make them:
- Mix the flour and salt in a large bowl.
- Add the water gradually, stirring until a dough forms.
- Knead the dough until it is smooth. Add a little more flour if it feels too sticky.
- Roll it out to approximately ¼ inch thick.
- Use cookie cutters to make stars, trees, hearts or other shapes.
- Use a drinking straw to make a hole near the top of each ornament.
- Place the shapes on a baking tray. An adult should bake them at approximately 200°F (93°C) until completely dry. This can take several hours, depending on thickness.
- Let the ornaments cool completely before painting or threading string through the holes.
Important safety note: Salt dough is not edible. Keep the mixture and finished ornaments away from children who may put objects in their mouths. Adults should handle the oven, hot tray and baking process.
Keepsake idea: Add your child’s name and the year to the back of an ornament.
7. Handprint Christmas Tree Keepsake
Age: 2+ with adult help | Time: 15–20 minutes, plus drying time | Mess: Medium
Materials:
- Green washable, child-safe paint
- White or cream cardstock
- Paintbrush or sponge
- Yellow paper
- Glue
- Marker
Children grow quickly, so a handprint craft can become a meaningful reminder of how small their hands once were. This project turns several handprints into a Christmas tree.
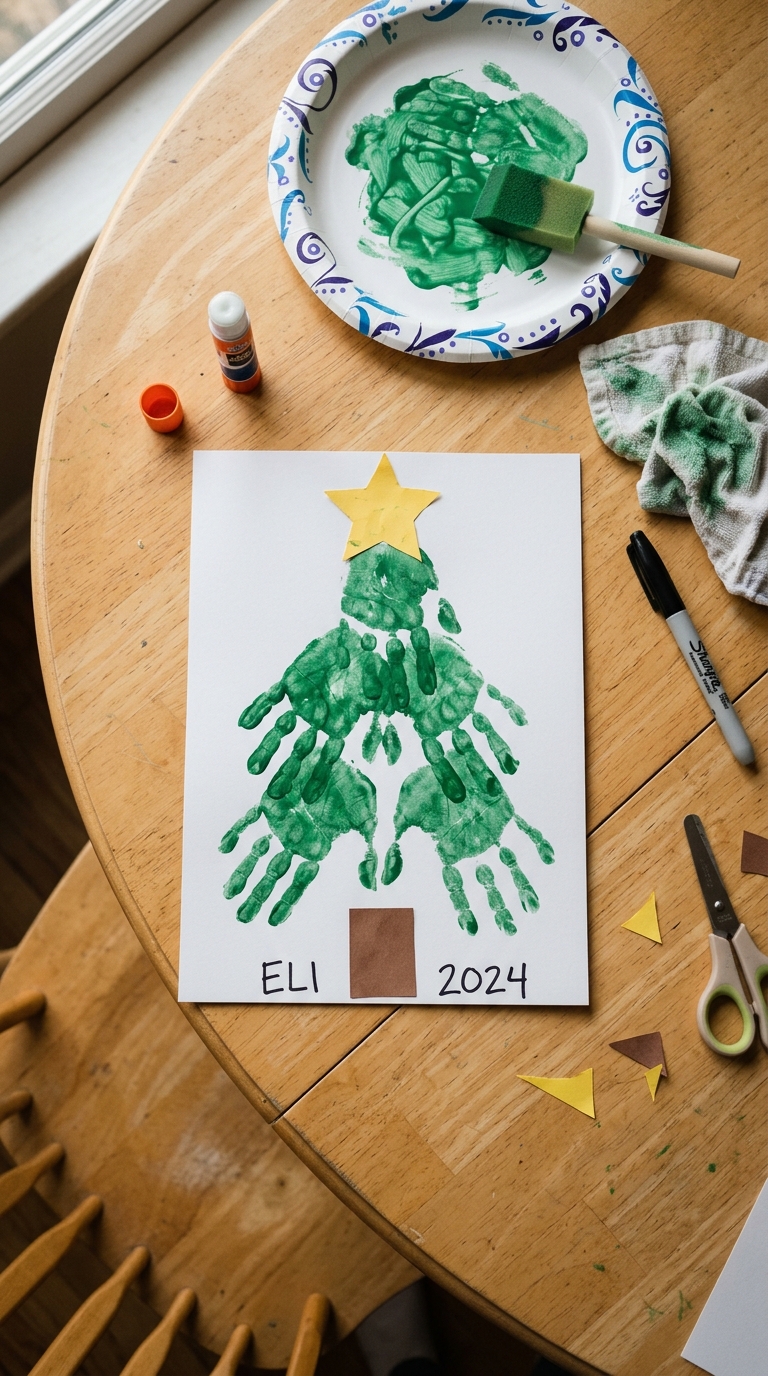
How to make it:
- Place the cardstock on a protected surface.
- Paint your child’s palm and fingers with a thin layer of green paint.
- Press the hand onto the paper with the fingers pointing downward.
- Repeat with additional handprints, arranging them in rows to create a tree shape. Make each row slightly shorter than the one below.
- Allow the paint to dry.
- Cut a small star from yellow paper and glue it above the tree.
- Add a brown paper trunk and write your child’s name and the year underneath.
Parent tip: Keep a damp cloth close by so you can clean little hands between prints.
Display idea: Put the finished picture in an inexpensive frame or store it with your family’s holiday artwork.
8. Handmade Christmas Gift Tags
Age: 4+ with supervision | Time: 15–20 minutes | Mess: Low
If you want easy Christmas crafts for kids that are useful beyond decoration, handmade gift tags are a lovely project to try.
Materials:
- Cardstock or leftover cardboard
- Child-safe scissors
- Hole punch
- Markers or crayons
- Stickers
- String or ribbon
Children can help prepare gift tags for presents going to family and friends. The finished pieces can be used throughout the holiday season.
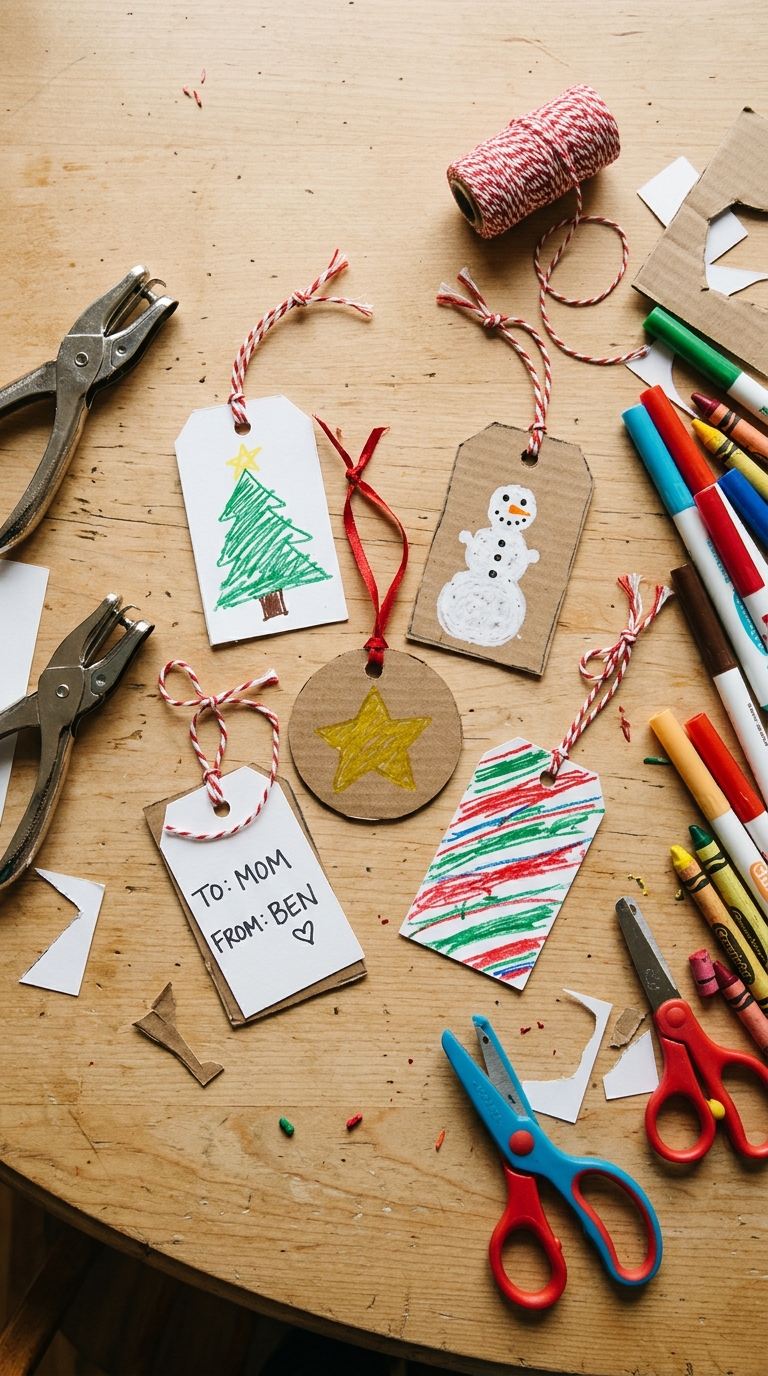
How to make them:
- Cut cardstock into small rectangles, circles or tag shapes.
- Punch a hole near the top of each tag.
- Let your child decorate the front with Christmas trees, stars, snowmen or simple patterns.
- Write the recipient’s name on the back or leave space for it.
- Thread a short piece of string or ribbon through the hole.
Make it easier: Prepare the tags and punch the holes before inviting younger children to decorate.
Budget tip: Reuse clean cardboard from packaging or old greeting cards for the base.
9. Potato-Stamped Christmas Wrapping Paper
Age: 5+ with close adult supervision | Time: 25–35 minutes, plus drying time | Mess: Medium to high
Materials:
- Plain kraft paper or large sheets of paper
- One or two potatoes
- Washable paint
- Paper plate or paint tray
- Marker
- Paper towels
Plain wrapping paper can become a personalised holiday design with a few simple stamps. Children can repeat one pattern or make a different design across the sheet.
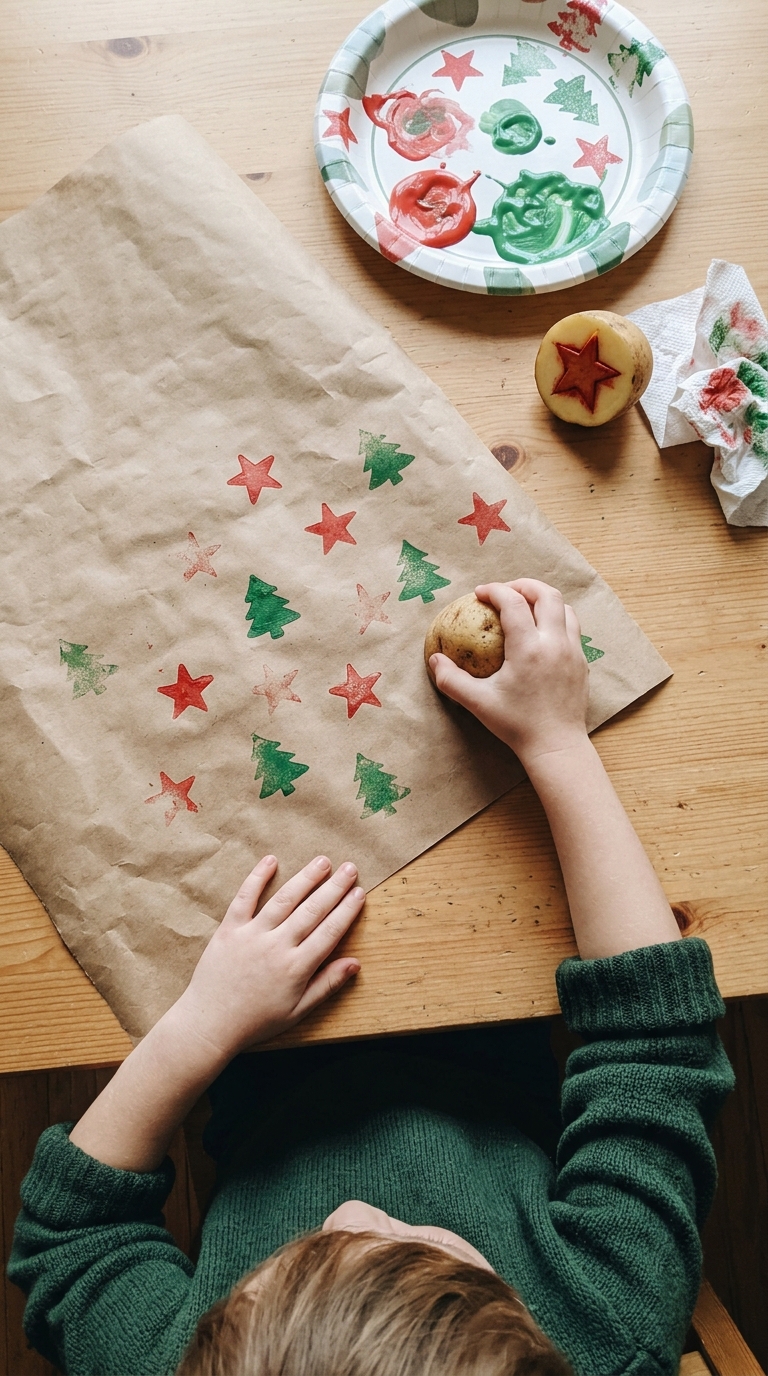
How to make it:
- An adult should cut a potato in half and carefully carve a simple shape into the flat surface, such as a star or Christmas tree.
- Pour a small amount of washable paint onto a paper plate.
- Help your child press the cut side of the potato lightly into the paint.
- Stamp the potato onto the paper, leaving space between each print.
- Repeat with another colour or shape if desired.
- Leave the paper flat until the paint is completely dry.
Important: Adults should handle the knife and prepare the potato stamps before children begin.
Make it personal: Use the finished paper to wrap small gifts or cover gift boxes.
10. Tissue-Paper Christmas Window Stars
Age: 4+ with supervision | Time: 20–25 minutes | Mess: Low
Materials:
- Coloured tissue paper
- Clear contact paper
- Scissors
- Pencil
- Star template or simple star outline
These lightweight stars add a little colour to a window without taking up shelf or table space. They are also a good choice when you want a decoration that is easy to store after Christmas.
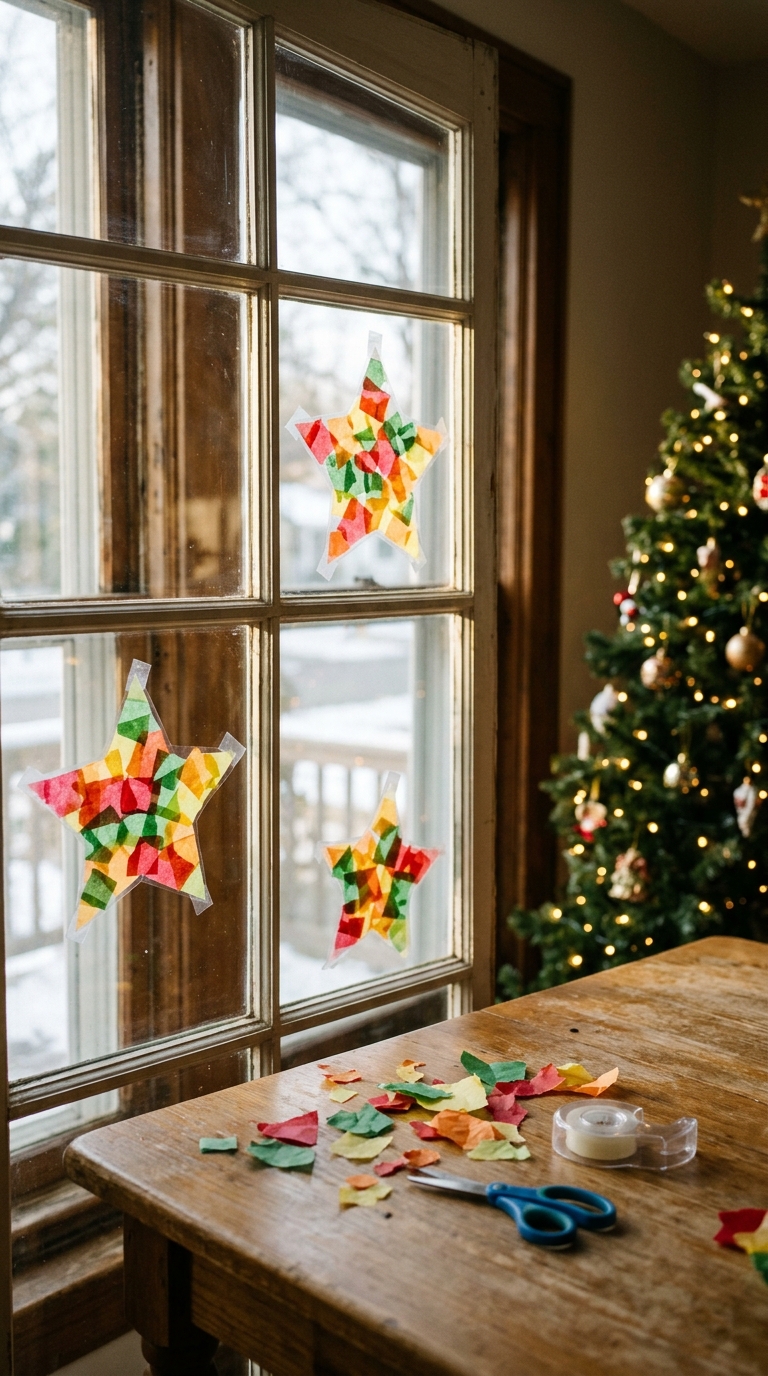
How to make them:
- Draw or print a simple star outline.
- Cut two matching pieces of clear contact paper large enough to cover the star.
- Place one piece sticky-side up on the table.
- Let your child tear tissue paper into small pieces and arrange them inside the star outline.
- Place the second piece of contact paper over the first to seal the tissue paper between the layers.
- Cut around the star shape.
- Attach it to a window using a small piece of removable tape if needed.
For younger children: Prepare the star outline and contact paper first, then let them arrange the tissue-paper pieces.
Display idea: Make several stars in different colours and place them together in a window.
Planning Easy Christmas Crafts for a Fun Afternoon
You don’t need to complete all ten projects in one day. Choosing two or three activities is often enough to keep children interested without making the afternoon feel rushed.
A simple approach is to choose:
- One quick craft: Fingerprint cards or handmade gift tags.
- One decorating project: Paper snowflakes or tissue-paper stars.
- One keepsake: Salt dough ornaments or handprint Christmas trees.
Set out the supplies for one activity at a time. If you have children of different ages, give younger children simpler tasks such as tearing paper, sticking shapes or choosing colours. Older children can help with measuring, folding and arranging materials.
Let the finished projects dry before moving them. Keep a tray or box nearby for artwork that needs to be stored until it is ready to display.
If you’re also preparing your home for the holidays, you may enjoy these ideas for celebrating Christmas in a small home without letting decorations take over your available space.
Christmas Craft Safety Tips for Parents
A little preparation makes craft time safer and more enjoyable. Keep these points in mind:
- Choose age-appropriate supplies. Check labels and follow the manufacturer’s age recommendations.
- Supervise small parts. Googly eyes, pom-poms, beads and other small decorations can pose choking hazards for young children. The U.S. Consumer Product Safety Commission’s small-parts guidance explains why these items require particular care.
- Use suitable art materials. Choose products intended for children’s use and check their safety information. The Art and Creative Materials Institute provides information about art-material safety.
- Keep sharp tools with adults. Knives, craft blades and other sharp tools should be handled by an adult.
- Manage hot equipment. Adults should handle ovens, hot trays and heated tools.
- Don’t let children eat craft materials. Paint, glue, salt dough and decorative supplies are not food.
For very young children, avoid projects with small loose decorations if they are still at the stage of putting objects in their mouths. You can replace small pieces with larger paper shapes or simply leave them out.
FAQs About Easy Christmas Crafts for Kids
What are some easy Christmas crafts for preschoolers?
Torn-paper Christmas trees, fingerprint cards and handprint keepsakes are good starting points. They use simple materials and allow young children to participate without needing precise cutting or complicated instructions. An adult should prepare any pieces that need sharp tools.
What Christmas crafts can kids make with household items?
Children can make cardboard tube reindeer, paper chains, gift tags and stamped wrapping paper using supplies you may already have at home. Clean cardboard packaging, paper scraps and empty toilet paper tubes can all be useful.
How can I keep Christmas crafts from becoming too messy?
Choose one activity at a time, cover the work surface and use washable paint where possible. Put out only the supplies needed for the project and keep a damp cloth nearby. Paper-based crafts are usually easier to clean up than projects involving paint, dough or glitter.
What Christmas crafts can children make as gifts?
Handmade gift tags, fingerprint Christmas cards, salt dough ornaments and decorated wrapping paper make thoughtful gifts. Children can personalise each one with colours, drawings or their names.
Make Simple Christmas Memories Together
The best easy Christmas crafts for kids don’t have to be complicated or expensive. A few basic supplies, a little preparation and room for children to experiment can turn an ordinary afternoon into something memorable.
Choose a project that suits your child’s age and attention span. Let them make their own creative choices, even when the finished result looks a little different from what you imagined.
Whether you make a paper snowflake, a handmade card or an ornament to bring out next year, the value is in the time spent creating together.